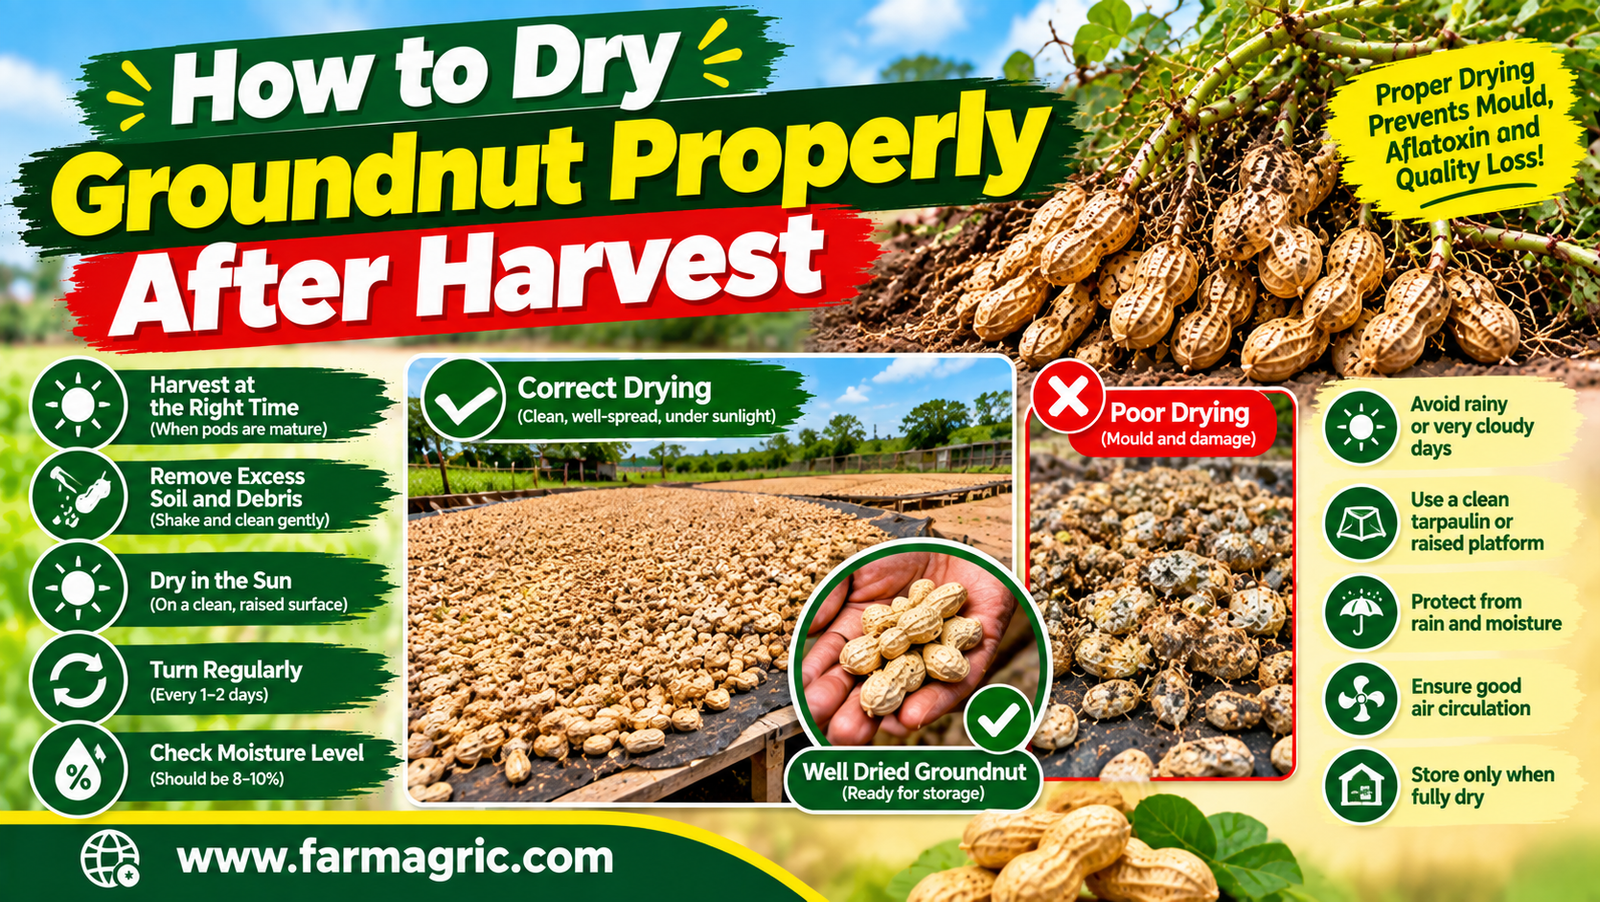
How to Dry Groundnut Properly After Harvest
How to Dry Groundnut Properly After Harvest: A Farmer’s Guide to Protecting Quality Before It Ever Reaches the Store
I remember bagging a harvest of groundnut once that looked dry enough to my hands and my eyes, the shells feeling reasonably firm and the whole pile looking the way groundnut was supposed to look after a few days in the sun. Within about three weeks of storage, a sour, musty smell started coming from those sacks, and when I opened one to investigate, I found patches of grey and greenish mold scattered through pods that had looked perfectly fine when I packed them. That loss taught me something I had never taken seriously enough before, that groundnut is particularly unforgiving of incomplete drying, far more so than many other crops I had grown, because the combination of oil content and the risk of aflatoxin contamination makes improperly dried groundnut not just lower in quality but genuinely unsafe to eat or sell. Since that season I have treated drying as the single most important step between digging and storage, not a quick formality to rush through before getting the harvest out of the way.
So let me answer you straight, because I know you have a harvest of groundnut spread out somewhere right now and you are trying to judge whether it has dried enough to store safely. You dry groundnut properly after harvest by field-curing the plants with pods attached for several days before picking, then spreading the picked pods in thin layers on a raised, well-ventilated surface in full sun, turning them regularly until the shells are firm and brittle and the kernels inside snap cleanly rather than bending, which generally brings moisture content down to around seven to eight percent, the level needed for safe storage without risking mold growth or aflatoxin development. Groundnut drying is not simply about getting the outside to feel dry to the touch, since the kernel inside the shell can still hold dangerous levels of moisture even when the pod itself seems reasonably firm, which is exactly why checking the kernel directly matters so much more with this crop than with many others.
Why Groundnut Drying Carries Higher Stakes Than Most Crops
Groundnut kernels are high in oil, and that oil content creates conditions that certain molds, particularly those capable of producing aflatoxin, find especially favorable once moisture levels allow them to establish. Aflatoxin is a serious health concern, linked to liver damage and other long-term health problems, and it can develop in groundnut that looks and smells essentially normal to a casual inspection, which makes proper drying not just a matter of preventing the kind of visible spoilage you might worry about with maize or rice, but a genuine food safety issue with consequences that are not always immediately obvious. This elevated stake is exactly why groundnut drying deserves more care and more direct checking than many farmers are used to giving other crops, and why judging dryness by a quick touch of the outer shell, without checking what is actually happening with the kernel inside, is a genuinely risky habit to carry over from other crops into groundnut handling.
What Most Farmers Get Wrong
The first mistake, the one that cost me that moldy harvest, is judging dryness by the feel of the outer pod shell alone, assuming that a firm, dry-feeling shell automatically means the kernel inside has reached a safe moisture level, when in reality the shell can dry and firm up well before the kernel inside has actually released enough of its internal moisture to be genuinely safe for storage.
The second mistake is skipping or shortening the field-curing stage, pulling plants and picking pods too quickly after digging without allowing the whole plant, pods still attached, time to begin drying naturally in the field first, which gives the pods a head start on moisture loss before they are separated from the plant and spread out for the main drying process.
The third mistake is drying pods in piles or thick layers rather than spreading them thinly, often done to save space or reduce the area needed for drying, which dramatically slows and unevens the drying process, leaving pods in the center of a thick pile still significantly moist long after the surface looks adequately dry.
The fourth mistake is drying directly on bare ground without any raised surface or barrier beneath the pods, allowing ground moisture to wick upward into the drying groundnut from below even while the sun is working to dry it from above, effectively working against the drying process rather than supporting it.
The fifth mistake is storing groundnut immediately after it feels dry without any additional confirmation check, rather than testing a sample of kernels directly by shelling a few pods and checking whether the kernels snap cleanly or still bend and feel slightly rubbery, which is a far more reliable indicator of true readiness than how the outer shell feels alone.
Step-by-Step Guide to Drying Groundnut Properly
Begin the drying process in the field itself, immediately after harvest, by field-curing the pulled plants for several days to about a week before picking the pods off, laying the plants in rows or small stacks with pods facing upward and exposed to sun and air where weather conditions allow. This initial field-curing period lets the pods begin losing moisture gradually while still attached to the plant, giving the whole drying process a meaningful head start before the more intensive spreading and turning stage that follows.
Pick the pods from the field-cured plants once the leaves have noticeably wilted and browned and the plant itself shows clear signs of having dried down considerably, rather than picking too early while the plant and pods are still largely green and moist.
Spread picked pods in a thin, even, single layer on a raised drying surface, such as a simple raised table, a tarpaulin or mat elevated slightly off bare ground, or a dedicated drying floor, ensuring the layer is thin enough that air and sunlight reach every pod rather than only the ones on top of a thicker pile.
Choose a drying location that receives full sun exposure for as much of the day as possible, and that allows reasonably good airflow around the drying pods rather than a sheltered, still corner where humid air tends to linger around the crop rather than moving through and carrying moisture away.
Turn the pods regularly throughout each drying day, at minimum two or three times, to ensure even exposure to sun and air across the whole layer and to prevent pods on the bottom of even a thin layer from staying consistently damper than those exposed directly on top.
Protect drying groundnut from rain or heavy dew by covering it promptly whenever weather threatens, or moving it under shelter if practical, since any re-wetting during the drying process sets back the progress already made and extends the total time needed to reach safe moisture levels, while also creating additional opportunities for mold exposure during that extended period.
Continue drying over several days to about two weeks depending on your climate, humidity, and the intensity of available sunlight, checking progress regularly rather than assuming a fixed number of days automatically means the crop is ready regardless of actual conditions during that specific drying period.
Test dryness directly by shelling a sample of pods from different parts of your drying layer, not just the pods on top or at the edges where sun exposure has likely been most intense, and checking the kernels inside. A properly dried kernel snaps cleanly and crisply when bent, while an insufficiently dried kernel bends without breaking or feels slightly soft and rubbery, a clear sign that more drying time is needed regardless of how the outer shell feels.
Use a moisture meter where you have access to one for a more precise confirmation, aiming for a moisture content around seven to eight percent for safe long-term storage, since this direct measurement removes the guesswork that hand-testing alone, while useful, cannot fully eliminate.
Sort dried pods before storage, separating out any that show visible mold, unusual discoloration, insect damage, or shells that remain notably softer or less brittle than the rest of the batch, since these compromised pods are both a quality risk and a potential source of contamination that can spread to otherwise well-dried pods if stored together.
Store properly dried groundnut in clean, dry sacks or containers, ideally in a cool, well-ventilated space off the ground, continuing to protect the crop from reabsorbing moisture from humid air or damp storage conditions even after the drying process itself has been completed successfully.
Check stored groundnut periodically over the following weeks, looking and smelling for any sign of developing mold, an off or musty odor, or dampness within the sacks, since catching an early problem allows you to re-dry or remove a small affected portion before it has the chance to spread through and compromise a much larger share of the stored harvest.
Warning Signs Your Groundnut Is Not Dry Enough
Kernels that bend rather than snap cleanly when you test a shelled sample are the clearest and most direct sign that drying is not yet complete, regardless of how firm or dry the outer shell might feel to casual handling. A pod shell that still feels slightly soft, flexible, or leathery rather than firm and somewhat brittle indicates the pod has not yet reached the level of dryness needed for safe storage. A musty, sour, or otherwise unpleasant smell developing either during drying or shortly after storage begins signals that moisture levels were too high when the crop was put away, and this smell often appears before any visible mold becomes obvious to the eye. Visible mold, whether grey, green, black, or white, appearing on pods either during a stalled or interrupted drying process or after storage has begun, confirms that moisture conditions allowed fungal growth to establish, and any affected pods should be removed and the surrounding batch checked carefully rather than assuming the problem is isolated to the visibly affected pods alone. And any noticeable clumping, caking, or dampness felt when handling a stored batch of groundnut, compared to the loose, easily flowing texture properly dried pods should have, points toward residual moisture that was not fully addressed before storage began.
What I’d Do Differently If Starting Again Today
If I were starting over, I would test kernel dryness directly by shelling and snapping a sample from every batch before ever considering it ready for storage, rather than trusting the feel of the outer shell alone the way I did with that moldy harvest, since that single habit would have caught the problem before it ever reached my storage sacks in the first place. I would commit to proper field-curing time before picking pods, rather than rushing straight from digging to spreading pods for drying, understanding now how much of a head start that initial curing period genuinely provides toward the overall drying timeline. I would spread every batch in a thin, single layer without exception, resisting any temptation to pile pods more thickly to save space or time, since I now understand how directly that thickness determines whether drying happens evenly or leaves a damp, dangerous center hidden beneath an adequately dry-looking surface. And I would invest in a basic moisture meter far earlier than I did, given how much more confidence that simple, direct measurement provides compared to relying entirely on touch and the snap test alone, particularly for a crop where the consequences of getting this specific step wrong are as serious as they are with groundnut.
Frequently Asked Questions About Drying Groundnut After Harvest
What moisture content is safe for storing groundnut long term? Around seven to eight percent moisture content is generally considered safe for extended storage, since groundnut above this level becomes significantly more vulnerable to mold growth and the aflatoxin contamination risk that comes with it, making this a meaningfully stricter target than the safe storage moisture levels common for many grain crops.
How can I tell if my groundnut is dry enough without a moisture meter? Shell a sample of pods from different parts of your drying batch and bend the kernels directly, since a properly dried kernel snaps cleanly and crisply while an insufficiently dried one bends without breaking or feels slightly soft, making this hand test a reasonably reliable substitute when a moisture meter is not available.
Why does groundnut need to be dried more carefully than maize or rice? Groundnut’s high oil content creates particularly favorable conditions for molds capable of producing aflatoxin, a serious health concern that can develop even in groundnut that looks and smells essentially normal, which raises the stakes of incomplete drying considerably beyond the more straightforward spoilage risk associated with improperly dried grain crops.
Does field-curing groundnut before picking the pods really make a difference? Yes, leaving pulled plants with pods still attached to dry in the field for several days to about a week gives the pods a meaningful head start on moisture loss before the more intensive spreading and turning stage begins, generally shortening the total time needed to reach safe storage moisture afterward.
What should I do if I find mold on some of my stored groundnut? Remove and discard any visibly moldy pods immediately, and carefully inspect the rest of that batch for any additional signs of moisture, off smell, or early mold development, since mold appearing in a batch signals that drying or storage conditions allowed excess moisture to persist, meaning the whole batch deserves closer inspection rather than assuming the problem was limited to the pods you happened to notice first.
If there is one thing I want you to remember from all this, it is that a dry-feeling shell is not proof of a dry kernel inside it, so shell a sample, bend it, and listen for that clean snap before you ever commit a harvest to storage, because with groundnut more than almost any other crop I grow, the difference between dry enough and not quite dry enough is the difference between a safe harvest and one quietly turning dangerous in the dark of a storage sack.