How to Start Beekeeping With Little to No Capital
How to Start Beekeeping With Little to No Capital
My first apiary cost me less than a pair of shoes. I had no savings to speak of, no equipment, and no one to teach me, only a stubborn belief that bees could pay for themselves if I let them. I built two hives from scrap wood, borrowed an old veil, and spent a whole rainy season learning by watching an old man in the next village. Within three years I had twelve colonies and enough honey and wax to pay for every hive I ever built afterward. The bees were free. What I spent was patience, time, and attention.
Here is the direct answer. You can start beekeeping with almost no money by learning first, building or borrowing simple hives from local materials, catching wild swarms instead of buying colonies, borrowing or making basic protective gear and a smoker, starting small with two to four hives, and reinvesting early honey and wax sales into growth. The real costs are your time, your learning, and your care, not cash. The honest limit is that very cheap setups produce less honey than well-equipped ones, and safety cannot be skipped to save money. Start small, start safe, and grow from what the bees give you.
Let me walk you through how to do it step by step.
What most beginners get wrong
The first mistake is buying everything before learning anything. Beginners spend their savings on expensive hives, tools, and imported bees, and then lose the colonies in the first dry season because they never learned how to manage them. Knowledge is the cheapest and most valuable thing you can get.
The second mistake is starting too big. Ten hives you cannot manage are worse than two you can. Mistakes multiply when you scale before you understand.
The third mistake is skimping on safety. Cheap should never mean unprotected. A bad attack can send you to hospital and put you off beekeeping for good.
The fourth mistake is badly built hives. A hive made from rough wood with big gaps, leaks, and no way to inspect the combs is cheap now and costly later, as it breeds pests, loses colonies, and makes harvesting destructive.
The fifth mistake is paying high prices for colonies of unknown quality. Costly colonies can be diseased or defensive, and swarms are free.
The sixth mistake is not planning for forage and water. Even the best hive fails where bees cannot find food and water.
The seventh mistake is expecting quick money. Bees need time to build up, and a new colony may give little or no surplus in its first season.
Step one: learn before you spend
Training is the best investment you can make, and much of it can be free.
Find a local beekeeper, honey hunter, or beekeeping group, and ask if you can watch, help, and ask questions. Offer to help with chores in exchange for teaching. Many beekeepers are glad to share knowledge. Attend demonstrations, farmers’ field days, and training sessions run by agricultural extension services, cooperatives, NGOs, or beekeeping associations. Some offer free or cheap courses and even starter kits.
Learn the basics: the life cycle of the colony, the roles of queen, workers, and drones, the seasons of forage in your area, how bees swarm and abscond, the common pests and diseases, how to use a smoker, how to inspect a hive, and how to harvest honey. Read free materials from agricultural offices and beekeeping organisations, and watch trusted video tutorials if you have a phone and data.
Spend a season observing. Look at the flowers in your area, and at the wild bees. Watch where bees fly, when they are busiest, and when the flowers fade. This tells you where to put your hives and when to expect honey.
Check local rules. Some areas require registration of apiaries or have rules about distances from houses, roads, and neighbours. Ask your local agricultural officer.
Step two: understand the costs and where to save
A beekeeping setup has several parts. Some you must not skimp on, and some you can build or borrow.
What you should not cheap out on. Protective gear is the first. A good veil is essential, because stings to the face and eyes are dangerous. Protective clothing that covers your body, wrists, and ankles is next. Keep a first aid plan. Never work bees without a veil.
What you can improvise. A smoker can be made from a tin can with a bellows, or bought cheaply from a local metalworker. A hive tool can be a flat bar, strong knife, or screwdriver, though a proper hive tool is cheap. A bee brush can be a bunch of soft grass or a feather. Gloves can be dispensed with by experienced beekeepers working gentle bees, but beginners are safer with them. Old, light-coloured clothing can serve as a bee suit if it is thick enough, with sleeves and trousers sealed at the wrists and ankles.
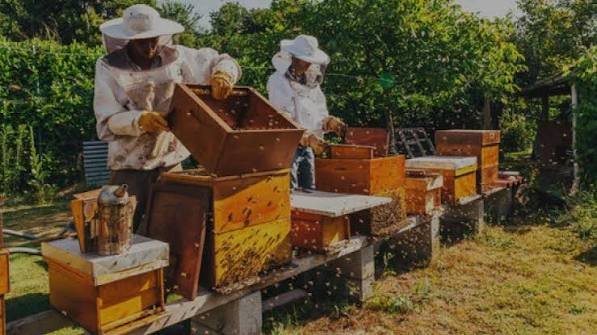
What you can build. Hives are the biggest saving. A simple top-bar hive can be made from local timber, bamboo, or other materials, with no frames, foundation, or expensive parts. Top-bar hives are widely promoted in low-income beekeeping programmes, because they are cheap, easy to make, and allow combs to be inspected and harvested without destroying the colony. Another option is a simple Langstroth-style or Kenya top-bar hive built by a local carpenter. Ask local trainers which design works best in your area, and ask for plans.
Traditional log hives and baskets are cheap, but they make inspection and harvest hard and often destroy combs. Use them only as a starting point, if at all, and move to movable-comb hives as soon as you can.
What you can catch for free. Colonies can be obtained from wild swarms. Setting out baits and swarm traps costs little, and swarms are free. See my guide on attracting wild swarms into an empty hive. Another low-cost option is a split from an existing colony, if you or a neighbour has a strong one, though this requires experience.
Step three: build simple, sound hives
You do not need a workshop. A basic top-bar hive is an elongated box, with sloping sides, a row of bars across the top, and a roof. The bars have a strip of wax or a groove that guides the bees to build comb straight. The hive is hung or placed on a stand. Local carpenters or training groups can show you how.
Whatever design you choose, aim for these qualities: tight joints with no gaps bigger than a bee space, a sound roof that sheds rain, a small entrance that the bees can defend, ventilation that can be adjusted, a smooth interior, and the ability to open the hive and inspect combs without destroying them. Use sound, dry timber or other suitable materials, and avoid wood treated with harsh chemicals. Avoid timber that smells strongly, such as fresh resinous wood, or let it dry well.
Protect hives with a stand that keeps them off the ground, with ant barriers. Use a simple roof of corrugated metal, thatch, or other cover, with an air gap above the hive for shade.
Building two or three hives is plenty for the first year. If you build your own, you can improve each one as you learn.
Step four: get bees cheaply
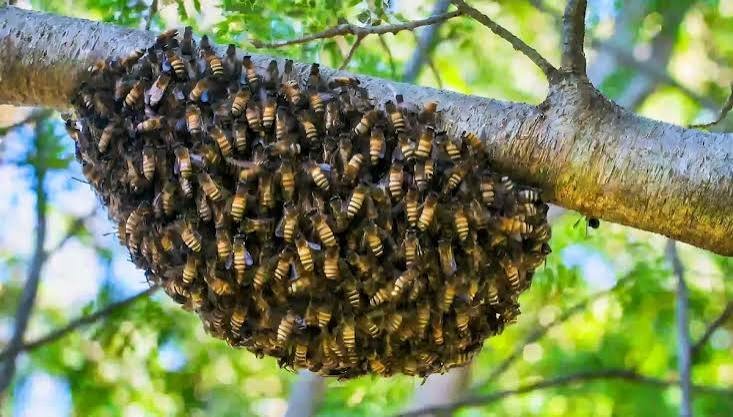
Catch swarms. Hang bait hives, as described earlier, in the swarming season. A prepared hive with a clean smell, a little beeswax, and the right size, hung in a shaded place near flowers, can attract a swarm. This is the cheapest way to get bees, but it takes time and luck.
Ask for swarms. Tell neighbours, farmers, and local officials that you are willing to collect swarms. People often call beekeepers when a swarm appears in a tree or building. Catching swarms from trees is easy for experienced beekeepers, but be safe, and have someone experienced with you the first time.
Take cut-outs or transfers with help. Wild colonies living in logs, walls, or trees can sometimes be moved to a hive. This is a skilled job and best learned from an experienced beekeeper. Do not try it alone.
Buy or barter. If you must buy, buy a small starter colony, called a nucleus, from a reputable beekeeper rather than a full colony, as it’s cheaper. Ask about the age and quality of the queen, the health of the bees, and the temperament. Avoid unhealthy or defensive colonies. Bartering your labour, or paying back with future honey or wax, may be possible.
Join a group. Some cooperatives or projects distribute colonies or loans to new beekeepers. Ask your agricultural office.
Step five: set up your apiary well
Choose a site that is shaded in the afternoon, sheltered from strong wind, well-drained, and away from paths, houses, livestock, and noise. Choose a spot with flowers and a water source nearby, and a safe approach for you to work. Face the entrance away from prevailing winds and paths. Keep tall dry grass cleared, and make firebreaks.
Put hives on stands with ant barriers. Provide a water container with stones or floating sticks. If the area has poor forage, plant bee-friendly trees, shrubs, and crops, in the knowledge that this takes time. Planting is free if you collect seeds and cuttings yourself.
Tell your neighbours before you install the bees, so they are not surprised. Give them honey, if you can, to build goodwill.
Step six: manage the bees through the first year
Keep management simple.
Check hives every one to two weeks in the active season, short and gentle, to observe the colony’s progress. Look for the queen or fresh eggs, brood, honey and pollen stores, space, and signs of pests or disease. Add space as the colony grows. Keep notes.
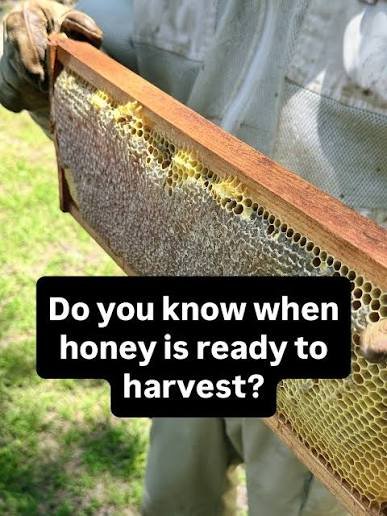
Make sure the colony is strong going into the dry or cold season. Do not harvest too much honey in the first year, and leave enough for the bees. If a colony is weak, unite it with a stronger one or help it with feeding.
Control pests with clean hives, ant barriers, and a strong colony. Ask local experts about diseases and pests in your region.
Keep the bees’ needs in mind: forage, water, shade, safety, and peace. See my other guides on managing weak colonies, dry-season care, and preventing absconding.
Step seven: earn from the bees, cheaply
Honey. Sell honey locally in clean, labelled jars. Start with friends, neighbours, markets, and local shops. Good presentation and consistent quality build a reputation. Reuse clean glass jars, and ask customers to return them. Ask your food authority about rules for selling honey.
Beeswax. Wax is a valuable by-product. Melt and filter cappings and old comb, and sell wax blocks or make candles, balms, and polishes. Wax can sometimes pay for hive-building materials.
Propolis and pollen. These can be sold in some markets, but they require more knowledge and care, and quality standards apply. Learn first.
Swarms and colonies. As you gain experience, you can sell nucleus colonies or catch swarms to sell. Keep the quality high, and be honest about the colony’s health.
Pollination services. In areas with orchards or crops that need pollination, farmers may pay for hive rental. This requires strong colonies, transport, and agreements.
Training and services. Experienced beekeepers can earn by training others, building hives, or providing swarm removal.
Reinvest. Use your early income to build more hives, buy a better veil or suit, and improve your equipment. Growing slowly from your own earnings avoids debt.
Keep records and be patient
Write down what you do. Note hive numbers, dates, colony strength, stores, flowering periods, problems, and harvests. Over time, the notebook will tell you which sites and hives do best.
Expect slow growth. In the first year, you may get little or no honey. A colony needs time to build comb, raise bees, and store food. The reward comes in the second and third years, when your skills and colonies mature.
Warning signs your start-up is going wrong
I watch for colonies that keep leaving, hives that are always empty, repeated stings or attacks, rotting or leaking hives, ants and moths in every hive, no forage nearby, no water, and a beekeeper who is too tired or too busy to check them. If these appear, slow down, fix the basics, and ask for help.
What I would do differently if I started today
I would find a mentor before I built a hive.
I would build two good hives instead of six poor ones.
I would buy a good veil first and everything else later.
I would plant bee forage on day one.
I would catch swarms, not buy colonies.
I would sell wax along with honey.
And I would keep notes from the first day.
Frequently asked questions
How much money do I need to start beekeeping?
It depends on your setup. With local materials, borrowed gear, and swarms caught for free, you can start with very little. Protective gear is the one cost to prioritise. Ask local beekeepers for realistic estimates in your area.
What is the cheapest type of hive?
Top-bar hives made from local materials are among the cheapest movable-comb hives, and are widely used in low-cost beekeeping programmes. Ask local trainers what works in your area.
Can I start beekeeping without training?
It is risky. Bees can be dangerous, and mistakes can lose colonies. Get at least basic training from experienced beekeepers first.
How long before I get honey?
Often not in the first season, and sometimes not until the second. It depends on the colony, forage, and weather.
Is beekeeping profitable?
It can be, especially if you keep several well-managed hives, sell honey and wax, and have good forage. But it takes time, skill, and patience, and returns vary by location and market.
The advice worth bookmarking
Bees cost nothing but they demand attention, so spend your first season learning instead of buying, build two good hives instead of six cheap ones, catch your swarms for free, and let the bees pay for the next hive.