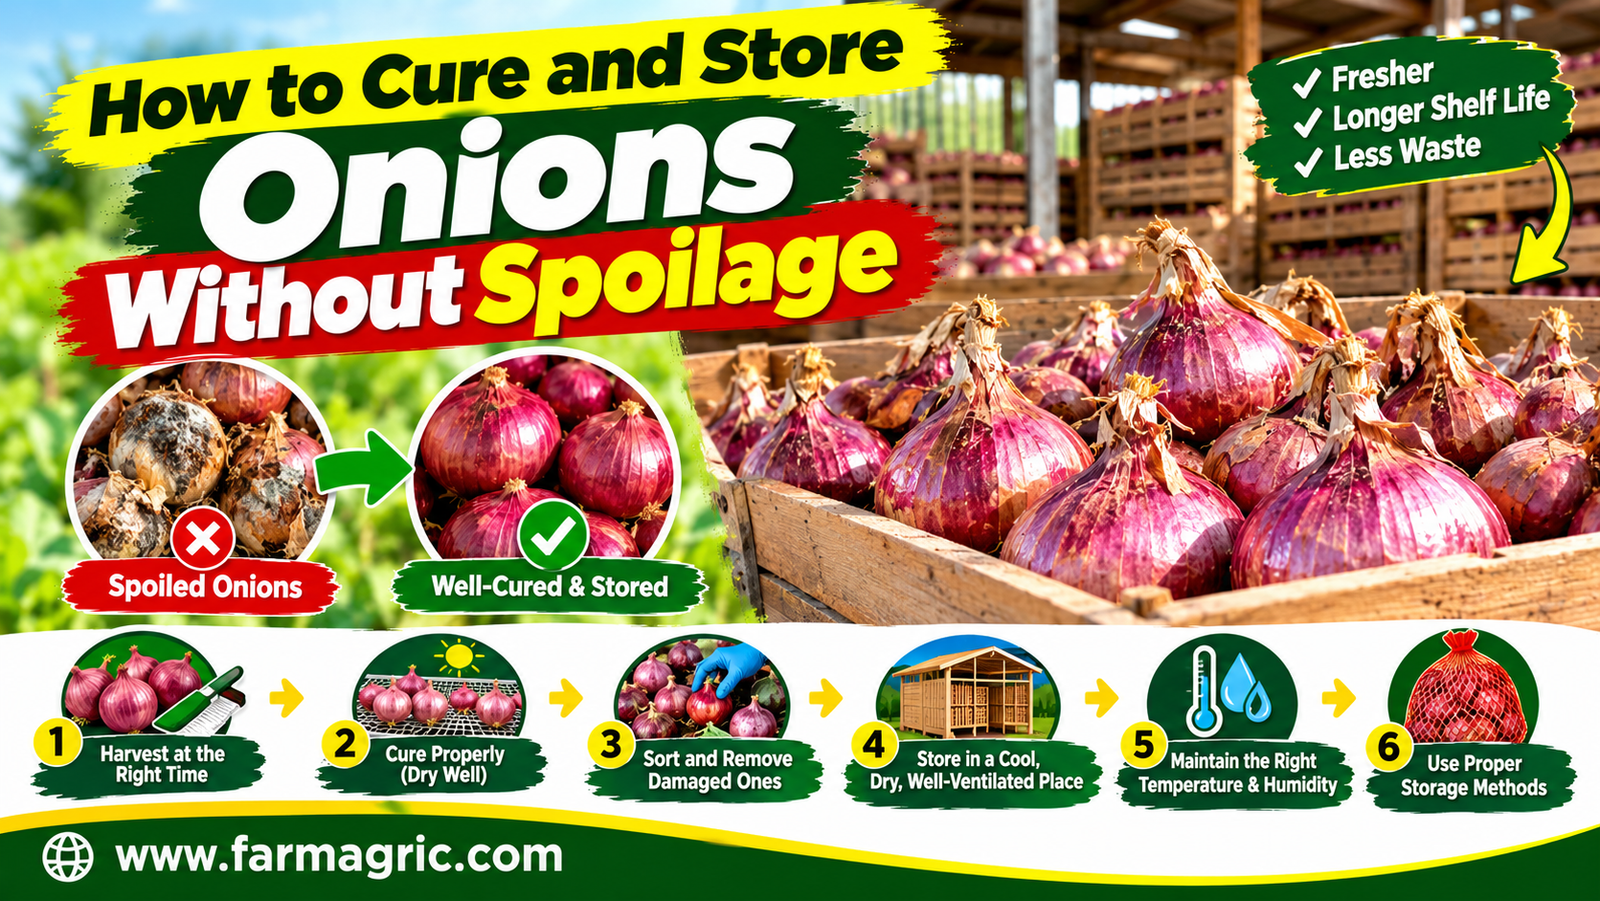
How to Cure and Store Onions Without Spoilage
How to Cure and Store Onions Without Spoilage
The most painful onion loss I ever had was not in the field. It was in a shed. I had pulled a heavy crop, bulbs the size of my fist, and I was proud of them. I trimmed the tops, piled them into sacks the same afternoon, stacked the sacks in a closed room, and went home pleased. A few weeks later the whole room smelled sour. The necks had turned soft and grey, the bulbs at the bottom were wet and collapsing, and I threw out more than I sold. Nothing had gone wrong with the growing. I had skipped the one step that decides whether onions keep or rot, which is curing.
Here is the direct answer. To cure and store onions without spoilage, harvest when the tops have fallen over and the necks have softened, lift the bulbs on a dry day, and let them dry in a shaded, airy, rain-free place for two to four weeks until the necks are tight and dry and the outer skins are papery. Then trim, sort out every damaged or thick-necked bulb, and store only the sound ones in a cool, dry, dark, well-ventilated place, in shallow layers or open mesh containers, never in sealed plastic and never wet. Check them regularly and remove any bulb that starts to go soft. Curing is not an optional extra. It is the step that turns a fresh, perishable bulb into one that can last for months.
The rest of this article explains how to do each step properly, and where farmers go wrong.
What most farmers get wrong
They harvest too early or too late. Onions pulled while the tops are still green and upright have thick, wet necks that do not seal, and those bulbs rot in storage. Onions left in the ground long after the tops have died, especially in wet weather, are more likely to regrow roots, split or pick up rot.
They skip curing or rush it. Curing is what dries the neck and the outer scales into a protective skin. An onion that has not been cured properly has an open wound at the neck, and that is where rot gets in.
They cure in the wrong place. Curing onions in direct sun can cause sunscald, which shows up as soft, sunken, discolored patches. Curing them in a closed, humid room, or out in the rain, does the opposite of drying them.
They cut the tops too early. Trimming the tops off freshly pulled onions leaves a wet, open stump. Tops should be trimmed after curing, when the neck is dry and tight.
They wash the bulbs. Water on the bulbs and in the neck invites rot. Brush off soil with a dry cloth or by hand, and leave washing for the moment of sale, if at all.
They store everything, including damaged bulbs. One bruised, cut or diseased onion can spoil the ones around it. Storing bad bulbs with good ones is one of the costliest habits in onion farming.
They store them in sealed bags or deep piles. Onions need airflow. Sacks packed tight in a hot room trap moisture and heat, and rot starts in the middle and spreads.
They grow for size and forget storage quality. Heavy late nitrogen, wet conditions near harvest and poorly suited varieties all produce onions that store badly, no matter how carefully you cure them afterward. Storage success begins in the field.
Why onions spoil, in plain terms
An onion is a living bulb. It keeps losing a little water and giving off a little heat. If the neck is open or damp, fungi and bacteria enter and cause neck rot, black mold, and soft, smelly rot. If the bulb is kept warm and moist, it breaks dormancy, sprouts and grows roots, which ruins its quality. So the enemies are moisture, warmth, wounds and poor airflow. Curing deals with moisture and wounds at the neck. Good storage deals with warmth, humidity and airflow. Together they give the onion what it needs to rest.
Step-by-step: how to cure and store onions properly
Step 1: Prepare the crop in the field. Good storage onions begin with a good growing season. Avoid heavy nitrogen late in the crop, since it leads to thick necks and soft bulbs. Stop irrigation as the crop approaches maturity, usually a week or two before harvest, so the bulbs can mature and dry. Choose varieties that suit storage, because some types are naturally better keepers than others. Pungent, firm-skinned, later-maturing onions tend to store longer than mild, early or very large soft types. Ask your seed supplier or local growers which varieties keep well in your area.
Step 2: Harvest at the right stage. Watch the tops. When a good majority of them have fallen over and the necks have gone soft and begun to dry, the crop is ready. A common guide is when roughly half to most of the tops have fallen, though your variety and conditions may vary. Do not bend or cut the tops to force this. Let the plant finish naturally.
Step 3: Lift on a dry day and handle gently. Choose dry weather, and loosen the soil carefully with a fork or by undercutting so you do not cut or bruise the bulbs. Pull them by hand, shake off loose soil without knocking them hard, and do not throw or drop them. Bruises and cuts become rot later.
Step 4: Field-dry briefly, protecting from the sun. If the weather is dry, you can lay the onions in rows in the field for a day or a few days to begin drying, with the leaves of one row covering the bulbs of the next so the sun does not scald them. If rain threatens, or the sun is very strong, move them to shelter right away. Never leave onions soaking in rain or baking in intense midday sun.
Step 5: Cure in a shaded, airy, rain-free place. This is the key step. Spread the onions in a single layer, or at most a shallow layer, on raised racks, wire mesh, slatted trays or hung nets, so air can move all around them. A covered shed with open sides, a veranda, a barn with good ventilation or a shaded structure with a roof works well. Keep them out of the rain and out of direct strong sun. Warm, dry, moving air speeds curing. Curing usually takes about two to four weeks depending on the weather, the size of the bulbs and how much airflow you have. In humid or rainy weather it takes longer, and good ventilation matters even more. Avoid curing in a closed room or under plastic, because trapped humidity defeats the purpose.
Step 6: Know when curing is finished. Check the necks. They should be completely dry, tight and narrow, with no moisture when you squeeze them, and no soft green or wet tissue. The outer skins should be dry, papery and rustle when you handle the bulb. The roots should be dry and wiry. If the neck is still thick or damp, keep curing. Never rush this, because a wet neck is the main doorway for rot.
Step 7: Trim the tops and roots. Once cured, cut the tops about two to three centimeters above the bulb, and trim the roots close to the base without cutting into the bulb. If you plan to braid onions for hanging, do it while the tops are still flexible and not fully brittle, which usually means doing it before they fully dry. Be gentle, and use clean tools. Do not cut into the bulb itself.
Step 8: Brush, do not wash. Remove loose, dirty outer skins and soil by hand or with a dry cloth. Do not wash onions that are going into storage. Keep them dry.
Step 9: Sort ruthlessly. Go through every bulb. Set aside any onion that is bruised, cut, soft, sprouting, moldy, spotted, thick-necked, double-centered or showing any sign of disease. Sell or use those first. Only sound, firm, well-cured bulbs with dry necks go into storage. It is far better to store fewer good onions than many mixed ones.
Step 10: Choose the right storage space. Onions store best in a cool, dry, dark, well-ventilated place. The ideal for long storage is a cold, dry store with moderate humidity, but most farmers do not have that, so aim for the coolest, driest and most airy space available, such as a shaded, well-ventilated store with openings for cross-breeze, protected from rain, sun and heat. Keep it away from sources of heat and from damp walls and floors. High humidity encourages rot and rooting, and heat encourages sprouting. If your climate is hot and humid, expect shorter storage life, and plan to sell or process earlier.
Step 11: Choose the right containers and layout. Store onions in open mesh bags, slatted crates, wooden or plastic crates with holes, on raised shelves or platforms, or hung in braids or nets. Keep the layers shallow so air moves through, and do not pile bulbs deeply or tightly. Raise containers off the floor, and leave space between them and the wall. Never use sealed plastic bags or closed containers for whole onions. Keep them away from potatoes, which release moisture and can speed spoilage, and away from fruits that give off ethylene gas.
Step 12: Check regularly and remove problems early. Every week or two, go through the stored onions. Remove any bulb that feels soft, smells sour, shows mold, or has started to sprout, and wipe away any moisture in the container. One bad onion removed early can save the rest. Check the necks first, because that is where trouble starts.
Step 13: Plan around realistic storage times. In cool, dry, well-ventilated conditions, good storage onions can keep for several months. In warm or humid conditions, expect weeks to a few months at best, depending on the variety and the quality of curing. Do not hold onions longer than they will keep, hoping for a better price. Sell or process before quality drops.
When fresh storage is not enough: dry or pickle the surplus
If you have more onions than you can sell before they start to turn, preserve some. Thin slices or rings of onion can be dried on clean racks in a solar dryer or airy covered place until brittle, then stored in dry airtight containers and used in cooking. Onions can also be pickled in vinegar using a tested recipe with proper acidity, for jars that keep for months. Cooked and sold products such as onion paste or fried onions can also add value, though they need proper handling and food safety knowledge. For anything beyond simple drying, follow tested recipes from a reliable source.
Warning signs your onions are going bad
Watch for necks that feel soft, wet or slimy, grey or black mold at the neck or between the scales, a sour or rotten smell, soft, sunken or discolored patches, bulbs that feel light and spongy, and green sprouts or roots growing from the base. Sprouting alone means the onion is breaking dormancy because it is too warm or damp, and is a sign to use or sell them soon. Bulbs with black powdery mold or soft rot should be thrown away, not eaten, and certainly not kept with the good ones.
What I would do differently if I were starting again today
I would prepare the curing space before the harvest, not after. I would build simple raised racks with plenty of airflow in a roofed, open-sided shed, so I never had to pile onions in a hurry. I would stop irrigation on time, harvest on a dry day, and give the onions their full curing period without cutting corners. I would trim only after the neck was truly dry, sort hard, and store in shallow mesh crates, checking them weekly. And I would plan my selling around the realistic life of my onions, not around my hopes.
Looking back, every big loss I had came down to the same thing: I treated harvest as the finish line. For onions, harvest is only the halfway point. Curing and storing decide whether your work turns into money.
FAQ
How long should onions be cured?
Usually around two to four weeks, depending on the weather, ventilation and bulb size. They are ready when the necks are completely dry and tight and the outer skins are dry and papery.
Where is the best place to cure onions?
A shaded, airy, rain-free place with good ventilation, such as an open-sided shed or covered veranda, with the onions spread in a single layer on racks or mesh. Avoid direct strong sun and closed, humid rooms.
Should I cut the tops off before curing?
No. Leave the tops on while curing, and trim them after the neck is completely dry, leaving a short stub of about two to three centimeters.
How do I store onions without a fridge?
Store cured, sound onions in a cool, dry, dark, well-ventilated place, in open mesh bags, slatted crates or hanging braids, in shallow layers. Keep them off the floor, away from moisture, potatoes and ripening fruit.
Why are my stored onions rotting from the neck?
Neck rot usually comes from harvesting too early, poor curing, wet or thick necks, or storing in damp, warm conditions. Make sure the crop is mature, the necks are completely dry before trimming and storage, and the storage place is dry and airy.
Bookmark this
An onion keeps as well as it was cured: dry the neck, sort the bad ones out, and give every bulb air.