How to Fix Poor Sprouting in Yam Seedlings
How to Fix Poor Sprouting in Yam Seedlings
One season I planted four hectares and waited. Two weeks passed, then three, then four. Neighbors’ mounds were already showing green shoots climbing the stakes, and mine looked like bare, sleeping hills. When I finally dug into a few mounds, I found setts that were soft, dark, and smelling sour. I had cut the seed in the rain, planted it wet, and buried it in heavy soil. I lost nearly a third of my stand and had to replant in a hurry, at double the cost.
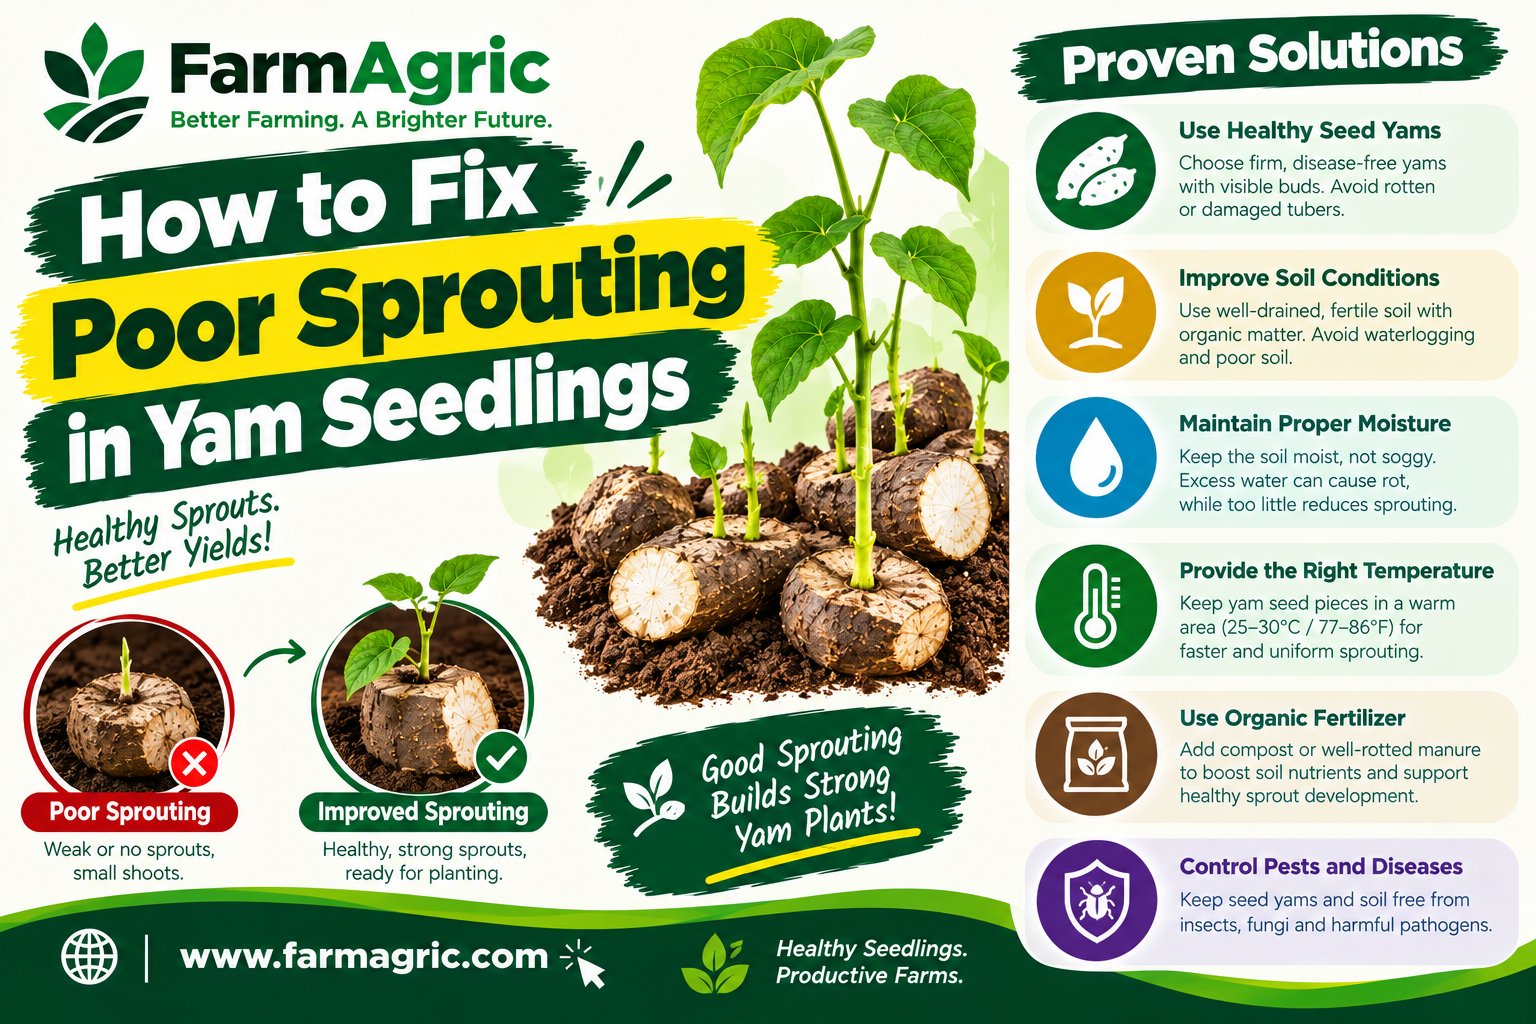
Here is the direct answer. Poor sprouting in yam usually comes from seed that is still dormant, seed that is diseased or rotting, setts that are too small or cut and planted without drying, soil that is waterlogged or too dry, or planting too deep. To fix it, dig up a few non-sprouting setts to see what happened, replace rotted seed quickly with healthy, cured setts, correct the moisture, and use a pre-sprouting method next season so you plant seed that is already waking up. The earlier you find the problem, the more of the season you can save.
That is the short version. Here is the full picture, from thirty years of gaps in my own fields.
What Most Farmers Get Wrong
The biggest mistake is waiting too long to check. A yam sett can sit in the soil for several weeks before sprouting, so farmers assume it is just slow. Sometimes it is. Sometimes it has been dead for two weeks. I dig up a few setts at about 3 to 4 weeks, and the answer is right there in my hand.
The second mistake is planting fresh-cut seed straight into wet soil. A cut yam is an open wound. Without a day or two to dry and heal, it takes in water and soil organisms, and rot beats the sprout every time.
The third mistake is using the wrong seed. Tiny setts have little stored food, so they struggle. Setts from tubers that were harvested too early, from “milked” plants, or from sick plants often sprout poorly or not at all.
The fourth mistake is expecting every sett to sprout on the same day. Yam seed has natural dormancy. A tuber that has just been harvested does not want to sprout yet. If you plant it too soon after harvest, it simply sleeps.
The fifth mistake is planting before the soil is ready. Hard, dry mounds stop shoots from pushing through. Soggy, cold, or flooded mounds rot the seed. Both are common in the same season.
The sixth mistake is blaming the seed seller for everything. Sometimes the seed was fine, and my planting method killed it. Check your own practice before you blame someone else.
Why Yam Setts Fail to Sprout
Once you know the causes, you can match what you see to a fix.
Dormancy. Yam tubers rest after harvest, and the length of that rest differs between varieties. Seed planted before dormancy ends will be slow and uneven. Storage conditions also affect it. Seed kept in a hot, dry place may behave differently from seed kept cool and airy.
Rot. Fungi and bacteria attack the sett through cut surfaces. Wet soil, uncured cuts, and unhealthy seed all raise the risk. A rotted sett turns soft, dark, and smelly.
Seed size and quality. Small, shriveled, or damaged setts lack the food reserve to push out a strong shoot. Seed from sick plants can carry disease into the new crop.
Poor handling in storage. Seed that dried out too much, overheated, or sprouted early and was broken off repeatedly in the barn arrives at planting tired.
Wrong planting depth or position. Setts planted too deep struggle to emerge. Setts planted with the wrong side down can sprout slowly or crookedly. Head pieces usually sprout earlier than tail pieces, so a field of all tail pieces can look very slow.
Soil moisture problems. Too dry, and the sett never wakes up. Too wet, and it rots.
Soil pests. Nematodes, termites, beetle grubs, and other soil pests can feed on the sett or damage the young shoot before it appears.
Fertilizer burn. Placing fertilizer right against the sett can burn the buds.
Late planting into hot dry soil. The mound loses moisture faster than the sett can use it.
Step 1: Find Out What Went Wrong
Do not guess. Carefully dig up 5 to 10 non-sprouting setts from different parts of the field. Use a small trowel and be gentle.
If the sett is firm and healthy with no sprout. It is probably dormant or short of moisture. Keep the soil lightly moist and give it another week or two.
If the sett is soft, dark, wet, or smells sour. It has rotted. Remove it, and plan to replant.
If the sett is hollowed out or tunneled. Termites, beetles, or grubs have eaten it.
If the sett is dry, shriveled, and light. It lost too much water before planting, or the soil is too dry.
If there are small shoots that are dead or twisted. Look for pests, fertilizer burn, or hard soil that stopped the shoot.
This quick check takes me an hour and tells me whether to wait, water, or replant.
Step 2: Fix the Problem in the Field
For dormant but healthy setts. Do not dig them up repeatedly. Keep the soil evenly moist with light watering or mulch, and give them time. Cover the mound with dry grass to hold moisture and moderate soil temperature. Check again in a week.
For rotted setts. Remove the dead seed and any contaminated soil around it. Replant that spot with a healthy, cured sett. Do not drop new seed into the same wet, infected hole without cleaning it out, or the new sett will follow the old one. If the mound is waterlogged, fix the drainage first.
For dry soil. Water gently and deeply at the base of the mound, not just the surface. Mulch afterward. Do not drown the mound in one go, because that can rot the sett.
For waterlogged soil. Open drainage channels between the rows, raise the mounds if they have slumped, and stop watering until the soil drains. If heavy rain keeps coming, you may need to replant when the weather settles.
For pest damage. Remove and destroy grubs you find. Where soil pests are a repeating problem, speak with your extension officer about registered treatments and the right timing, and follow every label instruction. I will not give a mixing rate here because rates vary by product, and misuse is dangerous.
For hard, crusted mounds. Break the surface crust gently with your fingers or a small tool so shoots can push through. Do not dig deep and damage the sett. Mulch afterward to prevent crusting.
For fertilizer burn. Stop applying fertilizer near setts that have not yet sprouted. Wait until the vine is established, then place fertilizer in a ring a hand’s width away from the vine.
Step 3: Replant the Gaps Early
Gap-filling is one of the most useful jobs on a yam farm. I check my field around 3 to 4 weeks after planting, mark the empty mounds, and replant them at once. Late replanting means a younger plant competing with older neighbors, and that plant will usually give a smaller tuber.
For replanting, I use healthy setts that are pre-sprouted if I have them. A pre-sprouted sett restarts growth much faster than a dormant one. I plant the same way as the main crop, with a well-made mound, mulch, and a stake once the vine appears.
If you are very late into the season, replant only if there is enough rain left for the tuber to bulk up. If not, use the gap for a quick cover crop or a short-season crop, and learn the lesson for next year.
How to Prevent Poor Sprouting Next Season
Fixing gaps is good. Not having gaps is better. This is the routine I follow now.
Choose healthy seed. Select tubers from vigorous, disease-free plants. Avoid seed with rot, nematode damage, beetle holes, or heavy scarring. Seed should be firm, plump, and clean.
Use a good sett size. Very small pieces sprout weakly. For many varieties, setts of roughly 200 to 500 grams give a strong start, though your variety and budget matter. Larger setts usually mean stronger early growth, so find the balance that suits you.
Cut seed well ahead. Do not cut and plant on the same day. Cut the tuber into setts a day or two before planting, using a clean, sharp knife. Wipe the blade between tubers if you suspect disease.
Cure the setts. Spread the cut pieces in a shaded, airy place for a day or two so the cut surface dries and heals. Dusting the cut ends with dry wood ash helps seal them. Where a registered fungicide treatment is recommended, follow the label exactly and ask your extension officer first.
Pre-sprout the seed. This is the single best habit I have adopted. Several weeks before planting, place seed yams or setts in a shaded nursery bed or crate with a loose, moist, clean material such as sawdust, rice husks, or fine dry grass. Keep it slightly moist, never wet. The setts begin to sprout, and you plant only those that show healthy shoots. Seed that fails in the nursery never makes it to the field, so you stop wasting land and mounds on dead seed. Pre-sprouting also gives you a more even stand.
Handle shoots gently. Once sprouts appear, treat them like eggs. Broken shoots delay growth and sometimes never recover.
Prepare the mounds properly. Make tall, loose, well-drained mounds before planting, and add compost or well-rotted manure to the soil. Hard, compacted mounds give shoots a rough start.
Plant at the right depth. Cover the sett with a thin layer of loose soil, a few centimeters, rather than burying it deep. Place it with the cut side up or according to your local practice, and make sure the sprouting end is not pressed against the soil in a way that blocks it.
Time the planting. Plant when the soil has enough moisture and the rains are reliable. Planting too early into dry ground, or too late into the tail end of the rains, both reduce sprouting.
Mulch right after planting. A layer of dry grass or crop residue holds moisture, keeps the mound from crusting, and moderates temperature.
Rotate crops. Avoid planting yam in the same field year after year. Rotation reduces nematodes, grubs, and soil diseases that attack setts.
Store seed well. Keep seed yams in a cool, shaded, well-ventilated barn, off the ground, and check weekly. Seed that rots or dries out in storage is already in trouble before planting.
Head, Middle, and Tail Pieces
Many farmers ask me about this. A yam tuber is not uniform. The head, the part nearest the vine, usually sprouts earliest and strongest. The middle usually sprouts well. The tail, the end farthest from the vine, is often slower and weaker.
If you cut all your tubers into setts, mix the pieces fairly across the field, or plant the head pieces on one block and the tail pieces on another, so you know what to expect. Some farmers plant whole small tubers or large heads for the most reliable sprouting. Pick a method based on your variety, your seed supply, and your budget, and keep notes so you can compare next year.
Warning Signs to Watch For
Check for these in the first weeks after planting.
Many mounds with no shoots after 3 to 4 weeks. Dig up a few setts and inspect them.
Soft, dark, or smelly setts when you dig. Rot has set in.
Shoots that appear and then wither. Look for pests, fertilizer burn, disease, or drought stress.
Uneven stand with big gaps in patches. This may point to poor drainage, a pest hotspot, or a batch of bad seed.
Cracked, crusted, or hard mounds. Shoots may be unable to break through.
Insects, grubs, or termites in the mound. They are eating the sett.
Standing water in the field. Waterlogging will kill seed.
What I Would Do Differently If Starting Again Today
I would pre-sprout every season, without exception. It is cheap, simple, and it ends the guessing.
I would never again cut and plant on the same day. Curing the setts costs me a day, and saves me weeks.
I would buy fewer, better seed yams instead of more, cheaper ones. Bad seed is expensive however little it costs.
I would dig up a few non-sprouting setts early instead of waiting and hoping. Information is cheap, and time is not.
I would keep a field record of seed source, sett size, planting date, weather, and sprouting percentage. After two or three seasons, the pattern is obvious.
And I would never plant into a mound I had not prepared properly. A tall, loose, well-drained mound solves half of all sprouting problems before they begin.
Frequently Asked Questions
How long does yam take to sprout?
It depends on the variety, the seed, and the weather, but many setts sprout within about 3 to 6 weeks after planting. Some dormant seed takes longer. If there is no sign after 4 weeks, dig up a few setts and check them.
Why are my yam setts rotting instead of sprouting?
The usual causes are planting freshly cut seed without curing, waterlogged soil, diseased seed, and planting too deep. Fix drainage, cure setts before planting, and use healthy seed.
Can I replant yam if some setts do not sprout?
Yes, and you should do it early, ideally within the first month. Use healthy, cured, or pre-sprouted setts and prepare the mound again. The later you replant, the smaller the tuber will usually be.
What is pre-sprouting, and does it really work?
Pre-sprouting means letting the seed yam start sprouting in a shaded nursery with a moist, loose material before planting it in the field. It works well because you plant only seed that is alive and waking up, which gives you a more even stand.
Do I need to put chemicals on yam setts?
Not always. Good seed, proper curing, wood ash on the cut surfaces, and good drainage prevent many problems. If you use a registered fungicide or insecticide treatment, follow the label and ask your local extension officer first.
Does the size of the sett affect sprouting?
Yes. Very small setts have little stored food and tend to sprout weakly. Larger, healthy setts give a stronger start, though cost and variety matter.
The Advice Worth Bookmarking
A yam field is won or lost in the first month. Plant seed that is alive, cured, and awake, in a mound that drains, and walk the rows with a trowel before the gaps become a story you tell your buyers.