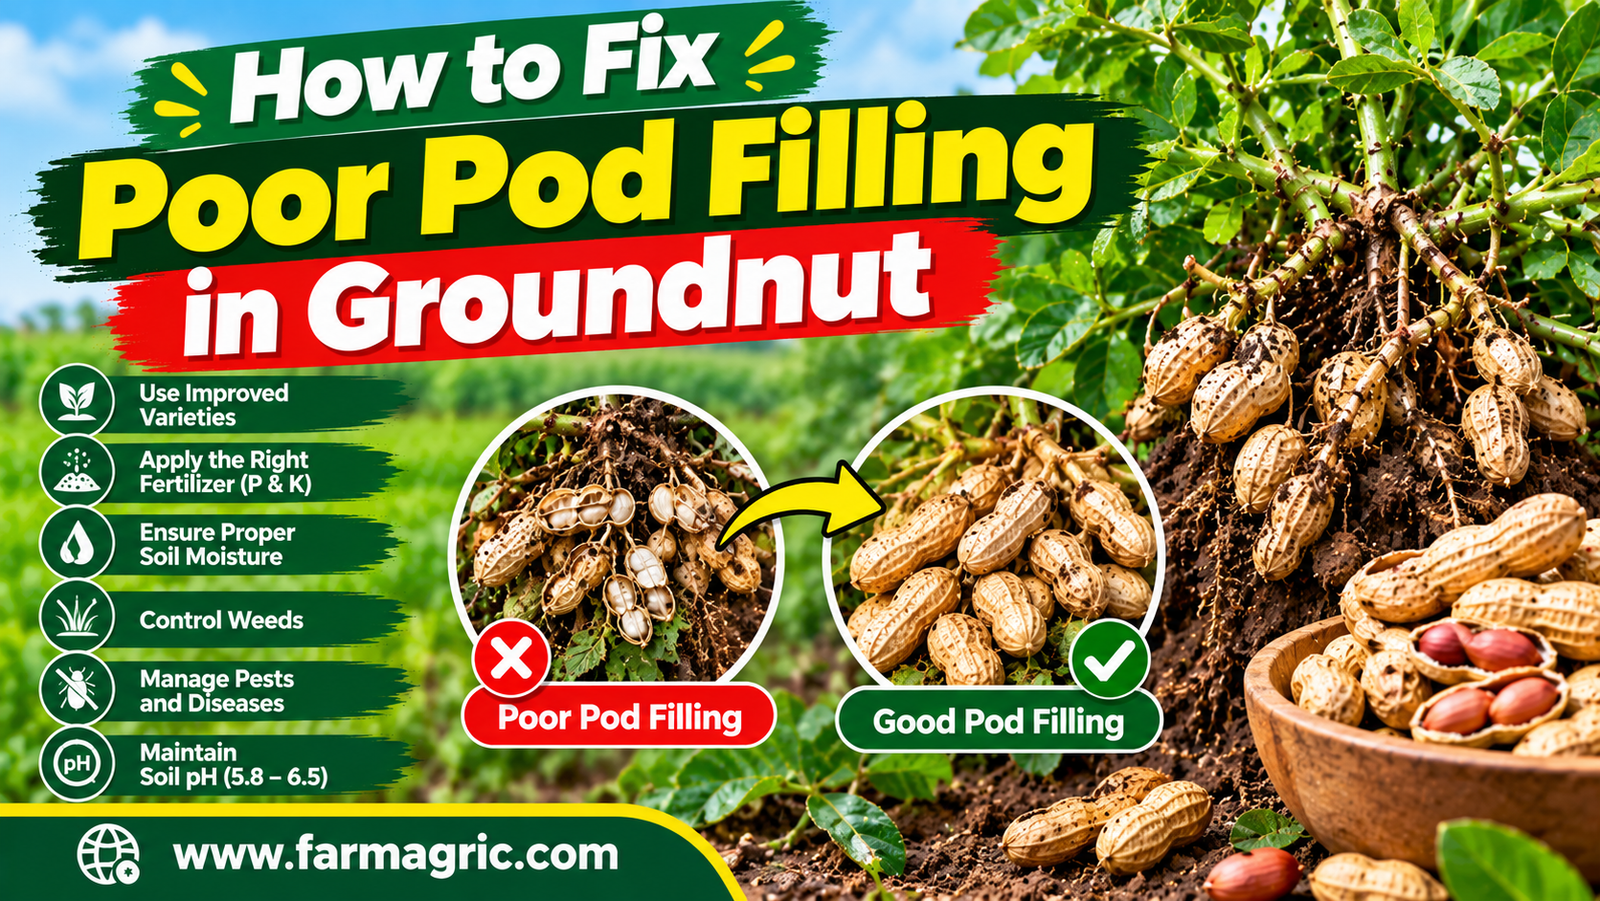
How to Fix Poor Pod Filling in Groundnut
How to Fix Poor Pod Filling in Groundnut: A Farmer’s Guide to Getting Pods That Are Actually Worth Digging For
I once pulled an entire groundnut plant from the ground expecting a satisfying cluster of plump pods, since the plant above ground had looked healthy all season, good leaf color, reasonable height, no obvious pest damage I had noticed while walking the field. What came up instead was a handful of pods, several of them flat and nearly empty when I cracked them open, with only a few actually containing well-formed seeds. I remember standing there turning that plant over in my hands, genuinely confused, because nothing about its appearance above the soil had warned me that the pods underneath were going to be such a disappointment. That harvest sent me looking for answers, and what I eventually learned is that groundnut has a strange and easily misunderstood life cycle, flowering above ground but forming and filling its pods entirely below it, which means a farmer can do everything right by the leaves and still fail the plant at exactly the stage that actually fills a basket.
So let me answer you straight, because I know you have dug a test plant recently and found pods that are too few, too flat, or too light for the effort you put into growing them. Groundnut pods fail to fill properly mainly because of calcium deficiency in the pegging and pod zone of the soil, moisture stress during the critical flowering and pegging period, poor peg penetration into hard or compacted soil, overcrowding or excess nitrogen that favors leafy growth over pod development, and disease or pest damage to the pegs and developing pods themselves, and fixing it means correcting the specific cause rather than assuming more general fertilizer or more time will solve a problem that is often tied to one very particular layer of soil most farmers never think carefully about.
Why Groundnut Pod Filling Is Different From Almost Any Other Crop
Groundnut has a genuinely unusual reproductive process that catches many farmers off guard once they learn the details. The plant flowers above ground in the normal way, but after fertilization, a structure called a peg grows downward from the base of the flower, pushes into the soil, and it is at the buried tip of that peg that the pod actually forms and develops. This means the pod is not simply a root product the way a cassava or yam tuber is, it begins its life above ground as a flower and only becomes a below-ground structure through this unusual downward-growing peg, and the specific layer of soil the peg penetrates into, typically the top few centimeters, has an outsized influence on whether that peg successfully forms a pod at all and whether that pod then fills properly with well-developed seeds. Calcium availability in this narrow pegging zone matters enormously, since the developing pod absorbs calcium directly from the surrounding soil rather than relying entirely on calcium transported up from the plant’s main root system the way most of the rest of the plant does, which is exactly why a plant growing in soil with perfectly adequate calcium deeper down can still produce poorly filled pods if that specific shallow pegging zone is lacking.
What Most Farmers Get Wrong
The first mistake, the one that left me confused standing over that disappointing plant, is judging the crop’s progress entirely by its appearance above ground, assuming healthy leaves and reasonable height mean the pods below are developing just as well, without ever digging a test plant partway through the season to actually check.
The second mistake is applying calcium, where it is applied at all, in a way that does not actually reach the pegging zone, such as deep soil incorporation before planting rather than surface application timed for when pegs are actively forming and penetrating that shallow layer, missing the specific window when the developing pod can actually make use of it.
The third mistake is allowing the soil surface in the pegging zone to become hard, crusted, or compacted, often from heavy rain followed by drying without any cultivation to break that crust, which makes it physically difficult for pegs to penetrate the soil at all, regardless of how good the fertility or moisture conditions might otherwise be.
The fourth mistake is applying heavy nitrogen fertilizer, assuming groundnut needs feeding the way many other crops do, without recognizing that groundnut, as a legume, produces much of its own nitrogen through its relationship with soil bacteria, and that excess nitrogen application often pushes the plant toward lush leafy growth at the direct expense of flower and pod development.
The fifth mistake is allowing moisture stress to occur specifically during the flowering and pegging period, treating groundnut as a generally drought-tolerant crop overall, which it is, without recognizing that this particular window is considerably more sensitive to moisture availability than the earlier vegetative stage or the crop’s reputation for toughness would suggest.
Step-by-Step Plan to Fix Poor Pod Filling in Groundnut
Start by digging a test plant partway through the pod-filling period, generally from around seven to eight weeks after planting onward, and examine what you find directly rather than waiting for a full harvest to reveal a problem that could have been caught and partly corrected earlier. Look at the number of pegs that have successfully formed pods, the size and firmness of those pods, and crack a few open to check whether the seeds inside are plump and well developed or thin and underfilled.
Assess calcium availability specifically in the pegging zone, the top few centimeters of soil directly around the base of the plants where pegs are penetrating, since this is the layer that matters most for pod development, considerably more than general soil calcium levels measured at typical sampling depth. Where a soil test or local knowledge suggests calcium is likely limiting in this zone, apply gypsum or agricultural lime as a surface application timed to coincide with early flowering and peg formation, generally around four to six weeks after planting, rather than incorporating it deeply into the soil before planting where it will not be positioned to help the shallow pegging zone specifically.
Check soil moisture through the flowering and pegging period with particular attention, recognizing this as the single most moisture-sensitive stage of the entire groundnut growth cycle despite the crop’s overall reputation for handling dry conditions reasonably well. Where you have any irrigation capacity, prioritize it during this specific window over almost any other point in the season, since moisture stress here directly limits both the number of pegs that successfully penetrate the soil and the ability of those that do to develop into well-filled pods.
Examine the soil surface in the pegging zone for crusting or compaction, particularly following any heavy rain that was then followed by hot, drying conditions without any intervention. A light, shallow cultivation around the base of plants during the flowering and early pegging period can break up this crust and significantly improve how easily pegs penetrate into the soil, though this cultivation needs to be done carefully and shallowly to avoid damaging pegs that have already begun forming.
Review your fertilizer history for the plot and reduce nitrogen application if it has been generous, recognizing that groundnut as a legume generally needs far less supplemental nitrogen than many other crops, and that excess nitrogen specifically favors the kind of vigorous leafy growth that competes with, rather than supports, strong flower and pod development.
Assess your plant spacing and overall canopy density, since overcrowded groundnut plants compete not only for light and soil nutrients the way any crowded crop would, but specifically compete for the limited pegging zone soil area immediately around each plant’s base, an issue somewhat unique to how this particular crop forms its harvestable product.
Scout for pest and disease pressure affecting the lower stems, pegs, and developing pods specifically, rather than focusing scouting attention only on the upper leaves and canopy, since damage at this specific location can directly reduce pod number and fill even when the rest of the plant shows no obvious sign of stress or damage.
Ensure your variety is genuinely well suited to your local soil and climate conditions, since some groundnut varieties handle marginal calcium or moisture conditions in the pegging zone noticeably better than others, and a persistent pattern of poor pod filling despite reasonable management may point toward a variety mismatch worth addressing in future plantings.
For an already growing crop showing early signs of poor pod filling, focus on what can still realistically be influenced, correcting calcium availability in the pegging zone where practical, protecting moisture through the remaining flowering and pegging window, and lightly cultivating any crusted soil surface, while recognizing that some of the season’s shortfall from earlier weeks may already be difficult to fully reverse.
Plan corrections for your next planting based on what the test digging and this season’s conditions revealed. If calcium was limiting, plan a properly timed surface application for the next crop. If moisture stress during flowering was the issue, plan irrigation priorities around that specific window rather than spreading limited water evenly across the whole season. If compaction was a factor, plan a lighter cultivation routine timed around the pegging period specifically.
Warning Signs to Watch For
A test plant that produces numerous pegs but relatively few actual pods, with many pegs seemingly failing to develop into anything substantial, often points toward either poor peg penetration from compacted or crusted soil, or calcium deficiency specifically limiting pod formation at the peg tip despite successful penetration. Pods that are present in reasonable numbers but feel notably light and flat, with thin or poorly developed seeds when cracked open, suggest that pods formed successfully but then failed to fill properly, pointing more toward calcium availability or moisture stress during the filling period itself rather than a peg penetration problem. Hard, crusted soil visible around the base of plants, particularly following a pattern of heavy rain followed by hot, drying weather without any cultivation in between, signals a physical barrier likely limiting peg penetration regardless of how good the underlying fertility might be. Unusually lush, dark green, vigorous leafy growth paired with disappointing pod numbers suggests a nitrogen imbalance keeping the plant oriented toward vegetative growth rather than reproductive development. And a pattern of worse pod filling in sections of a field known to be drier or more exposed during the flowering and pegging weeks, compared to sections with more reliable moisture during that same window, points clearly toward moisture stress as the limiting factor in those specific areas.
What I’d Do Differently If Starting Again Today
If I were starting over, I would dig a test plant around seven or eight weeks after planting as standard practice on every plot, rather than waiting for the full harvest to reveal whether pod filling had actually been happening the way it should, since that confusing, disappointing plant taught me directly how little the view above ground actually tells you about what is happening at the peg tip below it. I would apply gypsum as a properly timed surface application in the pegging zone specifically, rather than assuming general soil fertility was automatically covering this particular need, since I now understand how distinctly this crop depends on calcium available right at the point where the pod is actually forming. I would prioritize any available moisture specifically during flowering and pegging, treating this window with the same seriousness I eventually learned to give the equivalent critical stage in rice and maize, rather than assuming groundnut’s overall drought tolerance meant this particular stage carried no special risk of its own. And I would pay far closer attention to soil surface conditions right around the base of my plants during this period, watching for crusting after rain and cultivating lightly when needed, rather than only thinking about soil structure in terms of initial land preparation before planting ever began.
Frequently Asked Questions About Poor Pod Filling in Groundnut
Why does my groundnut plant look healthy above ground but produce poor pods underneath? This disconnect happens because groundnut forms and fills its pods through a unique underground process involving pegs that grow down from the flower, and this process depends heavily on conditions in a very specific shallow soil zone, particularly calcium availability and moisture, that have little direct connection to how healthy the leaves and stems appear above ground.
Does groundnut really need calcium applied separately from general fertilizer? Yes, because the developing pod absorbs calcium directly from the immediate surrounding soil in the pegging zone rather than relying on calcium transported from deeper in the root system, a calcium application timed and placed specifically for this shallow zone, often through surface-applied gypsum around early flowering, addresses a need that general fertilizer or deep soil calcium often does not reach effectively.
What is the most critical time for watering groundnut to ensure good pod filling? The flowering and pegging period, generally beginning several weeks after planting and continuing through early pod development, is considerably more sensitive to moisture stress than groundnut’s overall drought-tolerant reputation might suggest, making this window the top priority for any available irrigation capacity during the season.
Can compacted or crusted soil really stop groundnut pegs from forming pods? Yes, since the peg must physically penetrate the soil surface to reach the point where pod formation occurs, hard, crusted, or compacted soil in that shallow zone can prevent pegs from entering the ground successfully at all, regardless of how favorable the fertility and moisture conditions might otherwise be.
Does too much nitrogen fertilizer hurt groundnut pod development? Yes, since groundnut is a legume capable of producing much of its own nitrogen through its relationship with soil bacteria, excess nitrogen fertilizer often pushes the plant toward vigorous leafy growth at the expense of flower and pod development, making a more restrained nitrogen approach generally more appropriate for this crop than for many non-legume crops.
If there is one thing I want you to remember from all this, it is that groundnut hides its real story in a few centimeters of soil that most farmers never think to examine closely, right where the peg meets the ground, so dig a test plant partway through the season, check that shallow pegging zone for calcium and moisture, and keep that soil surface loose enough for every peg to actually reach the depth it needs, because the plant that looks proudest above ground is sometimes quietly failing at the one underground job you actually planted it to do.