How to Know When Onions Are Ready to Harvest
How to Know When Onions Are Ready to Harvest
I once pulled a whole bed of onions a full week early because the bulbs looked big and a buyer was calling. They were juicy, thin-skinned, and the necks stayed wet no matter how long I cured them. By the third week in the shed, a third of them had gone soft. The next season I went the other way and waited for every single top to fall, and a heavy rain caught the bulbs sitting in wet soil. Between those two mistakes I learned that onions tell you when they are ready, but they say it quietly, and you have to know where to look.
Here is the plain answer. Onions are ready to harvest when the tops have turned yellow and begun to fall over, with roughly half to three quarters of the plants lying down, and the necks have gone soft and thin. The bulbs should feel firm, with dry, papery outer skins that rustle in your hand. Most onions reach this point about 90 to 150 days after transplanting, depending on the variety, but the tops are a better guide than the calendar. Pick a dry day, lift the bulbs carefully, and cure them before storage.
The short version of what I do is this. I note the expected maturity window for the variety, stop watering about two weeks before I expect to lift, watch the tops for yellowing and falling, pull a few bulbs to check the skins and necks, and harvest once most of the field has tipped over, on a dry day. The rest of this article explains each sign, what most farmers get wrong, and how to handle the crop after it comes out of the ground.
What Most Farmers Get Wrong
The first mistake is harvesting by size. A big bulb is not always a mature one. Onions can swell right up to the last days, and a bulb pulled while the tops are still green has a thick, wet neck and thin skin. It looks impressive in the field and cures badly.
The second mistake is harvesting by the calendar alone. The seed packet gives a range, but heat, rain, planting date, and variety can shift the real date by a couple of weeks. Cutting on day 100 because the packet said so often catches the crop too early or too late.
The third mistake is breaking the tops down by hand to force maturity. Some farmers bend or trample the tops while they are still green, hoping to speed things up. This can stop bulb growth, leave the neck open, and invite rot. Let the plant fall over on its own.
The fourth mistake is watering right up to harvest. Wet soil around a maturing bulb keeps the neck soft and the skins from drying, and it is an open invitation to rot. Water should stop well before lifting.
The fifth mistake is waiting too long. Onions left in the ground after the tops have fully died back are exposed to rain, rot, sunscald, and in some varieties the outer skins split and the bulbs begin to regrow roots. A late harvest in wet weather can wipe out a good crop.
The sixth mistake is lifting in wet weather. Bulbs pulled in rain carry that moisture into the heap, and the necks never dry properly.
The Main Signs of Maturity
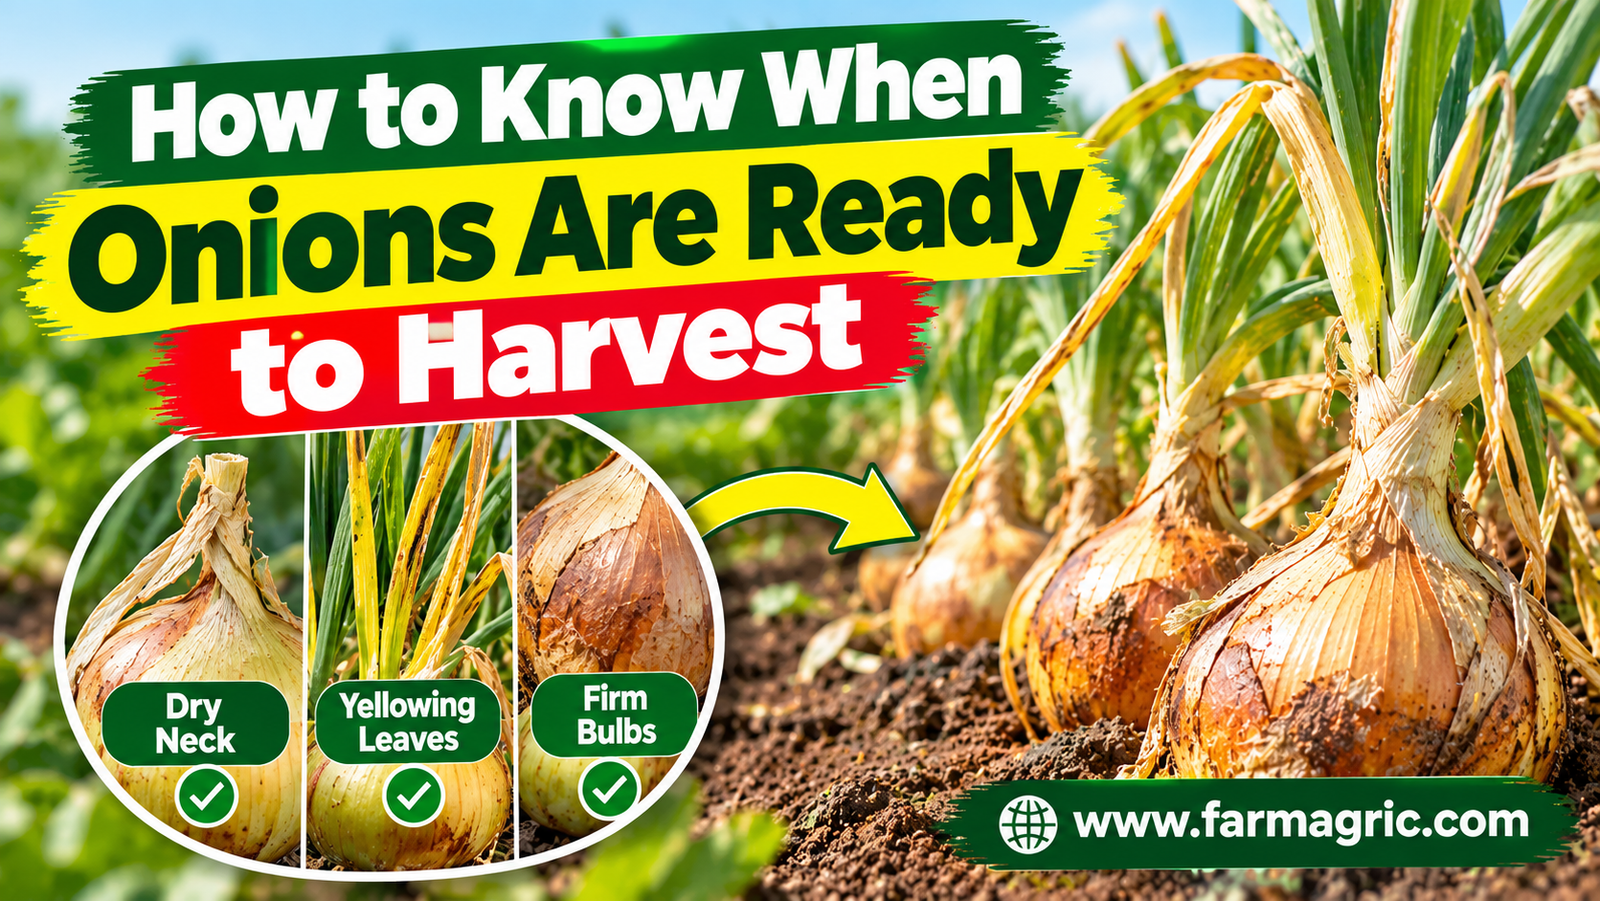
Look at the tops first. As the bulb finishes growing, the plant stops sending energy to the leaves. The tops turn yellow, then begin to weaken at the neck and fall over. When roughly half to three quarters of the plants in the field have fallen, you are close. Some farmers wait for nearly all of them, but I prefer to start when most have gone, because the last few often stay upright while the bulbs sit in the soil.
Look at the necks. A mature onion has a soft, thin neck that has begun to tighten and dry. A thick, firm, green neck means the bulb is still growing. If you can squeeze the neck and it feels hollow and limp, the bulb is near ready.
Look at the skins. Pull a few bulbs and rub the outer skin. Mature skins are dry, papery, and rustle when you handle them. They should be the normal color for the variety. Immature bulbs have thin, moist, shiny skins that are hard to peel cleanly.
Feel the bulb. A ready bulb is firm all the way through. A bulb that feels soft at the shoulders or squeezes easily is either immature or already rotting.
Check the roots. Roots begin to dry and shrivel as the bulb matures. Bulbs that are starting to push out lots of fresh, white new roots after a rain have been left too long.
Use the Calendar as a Guide
Write down your transplanting date and find the expected days to maturity for your variety. Early types may be ready in about 90 to 110 days from transplanting, mid-season types in 110 to 130, and late storage types in 130 to 150 days or more. Seed dealers usually give a range, and your extension office can tell you what to expect locally.
Start checking about a week before the earliest expected date. Warm weather speeds maturity, and cool or stressed crops run late. Keep a notebook with your planting date and the date you actually harvested, and after a couple of seasons you will know how your own land behaves.
Stop Water at the Right Time
Cut back on irrigation as the bulbs reach full size and the first tops begin to weaken, and stop completely about two weeks before the expected harvest. This lets the soil dry, the necks tighten, and the outer skins begin to cure before the bulbs are even lifted. If rain is heavy and frequent, raised beds and good drainage help the soil dry.
Do not let the crop go completely bone dry and then flood it in the last stage, since sudden swings can split bulbs. Aim for a steady, gentle dry-down.
Timing Around the Weather
Check the forecast daily once the tops start to fall. The best harvest day is dry and sunny, ideally after a few days with no rain, so the soil is not clinging to the bulbs.
If heavy rain is coming and most tops have fallen, harvest before it arrives, even if a few plants are still standing. Bulbs sitting in wet soil after maturity are the ones that rot. If you have lifted bulbs in the field and rain threatens, move them under cover at once.
In very hot weather, do not leave bulbs lying in direct sun for long, because the exposed bulbs sunscald and their skins turn pale and papery in the wrong way. Cover the bulbs with the tops of neighboring plants, or move them to shade.
How to Harvest Properly
Loosen the soil along the row with a fork, a few centimeters from the bulbs, and lift gently instead of yanking by the tops. Pulling hard can snap the necks and leave open wounds. Shake off loose soil with your hand, but do not knock the bulbs against each other or against the ground.
Lay the bulbs in the row with the tops covering the bulbs, so they are shaded but still drying. Leave them in the field for a few days only if the weather is dry and sunny. Bring them under cover if rain threatens.
Never throw bulbs into crates or sacks. Bruises and cuts open the way for bacterial and fungal rots. Handle them like eggs.
Curing After Harvest
Curing is part of harvest, and it is what makes onions keep. Move the bulbs to a dry, shaded, well-ventilated place, such as a raised rack, a mesh table, or an open shed, and spread them in a thin layer. Leave them for one to three weeks, depending on the weather, until the necks are completely dry and tight, the roots are brittle, and the outer skins are papery.
Do not cure in a closed, humid room or in direct hot sun. Good airflow is what you want. Turn the bulbs now and then so they dry evenly.
When cured, trim the roots close to the base and cut the tops to about two to three centimeters above the bulb, or leave them long if you plan to braid them. Sort out any bulbs with soft or wet necks, wounds, or signs of rot, and use or sell those first, away from the sound ones. Store the good bulbs in a cool, dry, well-ventilated place, in mesh bags or slatted crates, not in sealed plastic.
Step-by-Step Practical Plan
If I were handing you a plan for the next crop, it would run like this.
Write down the transplanting date and the expected days to maturity for your variety.
Start easing off irrigation as the bulbs reach full size, and stop watering about two weeks before the expected harvest.
Begin checking the field about a week before the earliest expected date.
Watch the tops. When roughly half to three quarters have turned yellow and fallen over, pull a few bulbs.
Check that the necks are soft and thin, the skins are dry and papery, and the bulbs feel firm.
Check the weather forecast, and choose a dry day to lift.
Loosen the soil with a fork, lift the bulbs gently, and lay them in the field with the tops covering them, or move them straight to cover if rain threatens.
Cure in a shaded, ventilated place for one to three weeks.
Trim, sort out soft or damaged bulbs, and store only the sound ones, then record dates and weather for next season.
Warning Signs to Watch For
Learn to read the field. Tops that are still green and upright mean the bulbs are still growing. Thick, firm necks mean the bulbs are not ready. Wet, soft necks with a sour smell mean rot has started, so lift those plants first. Fresh white roots pushing from the base after rain mean the bulbs are past their best. Split outer skins or exposed bulbs show the crop has been left too long. A forecast of several wet days after the tops have fallen means harvest now.
If you see any of these, act that week, not next month.
What I Would Do Differently If Starting Again Today
If I were starting fresh, I would write the planting date on a stake at the end of every row and keep a notebook of the harvest date for each variety. I would stop the water early and trust the tops, not the size of the bulbs. I would build a cheap curing rack before planting, because every onion I ever lost in storage was lost to poor curing, not poor growing. And I would plan the harvest around the forecast, lifting a day or two early rather than leaving a ripe field standing in the rain.
I would also stop pulling for the buyer’s schedule. An onion lifted at the right time and cured well sells itself, while one rushed to market sells at a discount.
FAQ
How do I know when onions are ready to harvest?
When about half to three quarters of the tops have yellowed and fallen over, the necks are soft and thin, and the bulbs are firm with dry, papery skins. Pull a few bulbs to confirm before lifting the field.
How many days do onions take to mature?
Most take about 90 to 150 days from transplanting, depending on the variety and the weather. Early types are quicker, and late storage types take longer.
Should I bend the onion tops over to speed up maturity?
No. Breaking green tops can stop bulb growth and leave the necks open to rot. Let the tops fall on their own.
What happens if I leave onions in the ground too long?
They are exposed to rain, rot, sunscald, and splitting skins, and they may start growing new roots. Late harvest in wet weather can cause heavy losses.
How long should I cure onions after harvest?
Usually one to three weeks in a dry, shaded, ventilated place, until the necks are fully dry and tight and the outer skins are papery.
The Advice Worth Bookmarking
Watch the tops, not the bulb. When the leaves lie down, the onion is telling you the growing is done, so stop watering, lift on a dry day, and cure it well.