How to Increase Groundnut Yield Per Acre: A Farmer’s Guide
How to Increase Groundnut Yield Per Acre
Early in my farming life, I planted a full acre of groundnut and told my neighbors I was expecting twenty bags. I harvested six. The plants looked green and healthy all season, and they flowered like crazy. But when I pulled them up, half the shells were empty and the rest were thin and light. I stood in that field feeling like the soil had cheated me. It hadn’t. I had made about five ordinary mistakes, and I made them for years before I understood them.
So here is the plain answer. To raise groundnut yield per acre, you need to do five things well: plant good seed at the right spacing, plant at the right time, feed the crop calcium when it flowers, keep weeds and leaf spot under control, and harvest and dry on time. Most farmers do two of these and wonder why their neighbor beats them every year.
An average farmer in my area gets about 400 to 500 kg of unshelled pods per acre. A careful farmer on decent soil can reach 800 to 1,200 kg, and I have seen more on very good land. Same crop, same rain. The difference is almost never luck. It is the small decisions, and I’ll walk you through every one of them.
What most farmers get wrong
I have walked a lot of groundnut fields, mine and other people’s, and the same problems keep showing up.
The first is planting whatever seed is left from last season. Old, damaged, or mixed seed gives patchy germination and weak plants. If one in four seeds fails, you have already lost a quarter of your harvest before the first rain finishes.
The second is planting too thin. Groundnut is not like maize. It needs a crowded, even stand to shade out weeds and use the field fully. A field with wide gaps feeds weeds instead of pods.
The third, and the big one, is ignoring calcium. Groundnut pods form underground, and the pod itself needs to take in calcium straight from the soil around it. If that calcium is missing, you get flowers and pegs and shells, but the shells are empty. Farmers call these “pops.” I lost a whole season’s profit to pops before someone showed me this.
The fourth is weeding too late or too roughly. Weeds in the first six weeks steal yield you never get back. Then, after flowering, farmers dig and hoe deep and tear off the pegs that were heading into the ground to make pods.
The fifth is harvesting late and drying badly. Leave mature pods in wet soil too long and they rot or sprout, and you invite mold. Dry them on bare ground and the quality drops, and the buyer pays you less.
Step 1: Start with the right field
Groundnut loves light, well-drained sandy loam. The pegs need to push into soft soil, and the pods need room to swell. In heavy clay that bakes hard, the pegs struggle to enter and many pods get left in the ground at harvest.
If your only land is heavy, make ridges and loosen the top soil well before planting. In low spots where water stands, groundnut will suffer, so raise your beds or plant somewhere else.
Do not plant groundnut after groundnut year after year on the same piece of land. Disease and pests build up, and yields fall. I rotate with maize, sorghum, or millet. Cereal after groundnut also benefits, because groundnut leaves some nitrogen behind in the soil. A good rotation alone has added more to my yield than any chemical I have bought.
The ideal soil is slightly acid to neutral. If your crops generally struggle on that land and you suspect very acid soil, get a soil test from your local extension office before spending money on inputs.
Step 2: Choose and prepare your seed
Buy certified seed or seed from a farmer you trust, and choose a variety suited to your area and your season length. In Nigeria, for example, improved varieties from the research institutes, such as the SAMNUT series, are bred for better yield and resistance to common diseases. Ask your local extension agent which one does best near you.
I shell my seed by hand a few days before planting, not weeks before, because shelled seed stored for long loses its power to germinate. I throw out every shriveled, cracked, moldy, or discolored seed, so only plump, clean, whole kernels go in the ground. If I can get a recommended seed dressing against soil fungi and insects, I use it, following the label exactly and wearing gloves. Treated seed must never be used for food or feed.
For seed rate, I use roughly 30 to 40 kg of shelled seed per acre for most bunch and Spanish types, depending on seed size. Larger seeds mean more weight is needed for the same number of plants.
Step 3: Time your planting
Plant when the rains are properly established, not on the first shower. Groundnut seed needs steady moisture to germinate. If you plant on a false start and a dry spell follows, the seed rots or sprouts weakly.
But do not plant late either. Late planting exposes the crop to more disease, especially rosette virus, and the harvest can then fall into wet weather when drying becomes a nightmare. I aim to plant within the first couple of weeks after the rains settle. My rule is simple: the ground should be moist several inches down, not just on the surface.
Step 4: Get the spacing and depth right
This is where I see farmers lose the most yield without knowing it.
For most varieties, plant in rows about 50 cm apart, with seeds 10 to 15 cm apart within the row, one or two seeds per hole. That gives you a thick, even stand. For spreading types that need more room, widen the rows a little. Check what your seed supplier recommends for your variety.
Plant about 4 to 6 cm deep. Too shallow and birds, rodents, and dry soil take the seed. Too deep and the seedling struggles to come up.
Two weeks after planting, walk the field and replace any gaps with a few pre-soaked seeds. A stand with gaps never recovers, and gap filling is the cheapest yield you will ever buy.
Step 5: Feed the crop properly
Groundnut makes most of its own nitrogen, because bacteria on its roots pull it from the air. So do not pour nitrogen fertilizer on it. You are wasting money and encouraging leaves over pods.
What groundnut does want is phosphorus, and above all, calcium. Single superphosphate is a good choice for phosphorus, because it also gives some calcium and sulfur. I apply it at planting or soon after, following the rate recommended for my area.
Calcium is the step that turned my yields around. Gypsum is a cheap calcium source that does not change soil acidity much. Apply it at the start of flowering, usually around four to six weeks after planting, spread evenly on the strip of soil on each side of the plant row where the pegs will enter. Typical recommendations are about 100 to 200 kg per acre, but confirm the rate for your soil with your extension agent. Light rain or a gentle scratch into the topsoil afterward helps it work. If you have been getting lots of empty shells, calcium is the first thing I would suspect.
If your soil is poor and your budget is tight, do not try to feed the whole farm. Put your money into seed, gypsum, and weed control on a smaller, better-managed piece. I would rather farm a well-run acre than a neglected two.
Step 6: Control weeds at the right time
The first six weeks are the critical window. Weeds during this period compete with young groundnut, and the crop never fully catches up.
My routine is to weed first about two to three weeks after planting, shallow and careful. I weed again around five to six weeks, just as flowers begin. After that, I stop deep hoeing. I pull larger weeds by hand if I must, but I do not disturb the soil around the plants.
Every peg you cut or bury wrongly is a pod you will not harvest. Light earthing up early on is fine, but once the pegs start heading down, leave the ground alone.
Step 7: Watch for pests and disease
I check my groundnut fields every few days, because problems are cheap to fix early and expensive to fix late.
Leaf spot, both early and late, shows up as brown and black spots on the leaves, which then yellow and drop. Heavy leaf spot can cut yield badly, because the plant loses the leaves that feed the pods. Resistant varieties, crop rotation, and a recommended fungicide sprayed at the first signs help a lot. Always follow the product label.
Rosette virus makes plants stunted and bushy with yellow, mottled leaves. Aphids spread it. You cannot cure an infected plant. Prevention is early planting, a thick stand, and removing infected plants early. Some varieties resist it much better than others.
Termites and white grubs attack roots and pods, especially in dry spells and light soils. Rotate fields, clear old crop residue, and use a recommended soil treatment if the problem is serious on your land. For aphids, leaf miners, and pod borers, scout your field regularly and spray only when numbers justify it, using products approved in your area.
There are warning signs I never ignore. Yellowing patches in an otherwise green field. Plants wilting in the morning, not just midday. Many flowers but very few pegs entering the soil. Brown spots spreading quickly after rain. Chewed pods when I pull a few plants to check.
Step 8: Harvest at the right time
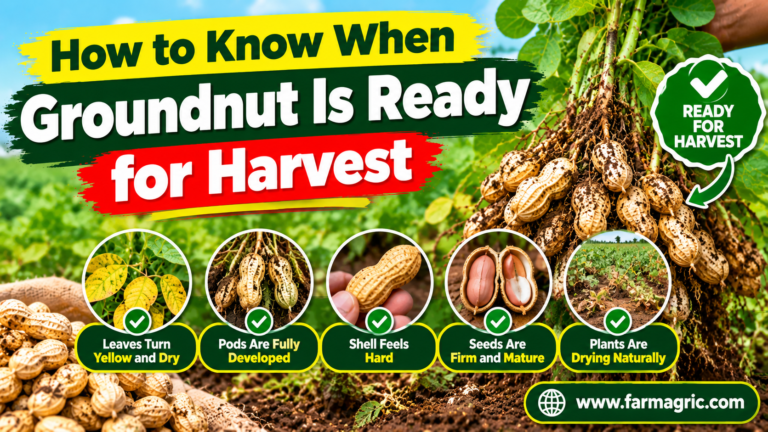
Groundnut does not ripen all at once, so farmers often guess wrong. Most varieties mature somewhere between 90 and 120 days, depending on the variety and the weather.
Do not rely on the calendar alone. About a week before the expected date, I dig up a few plants from different spots. When most pods show a dark, netted pattern on the inside of the shell, and the kernels fill the shell and have their proper skin color, it is time. The leaves on the plant will also be yellowing.
Harvest when the soil is moist enough to lift plants without snapping off pods. If the ground is rock hard, pods stay behind. If you wait for rain to soften it, do not wait too long.
Step 9: Dry and store like your money depends on it
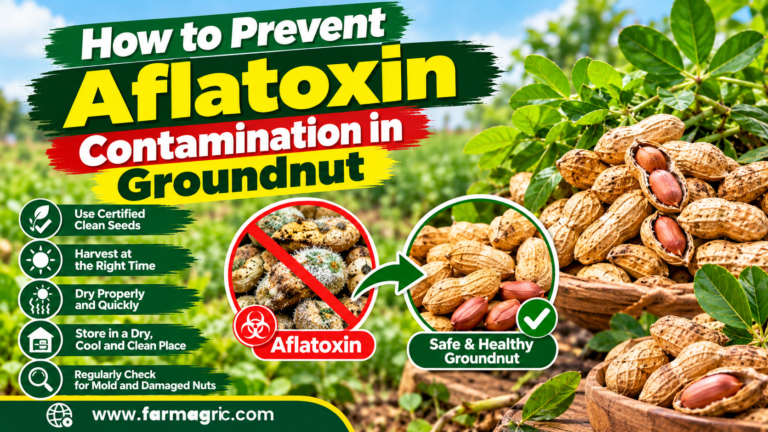
Because it does. Wet or poorly dried groundnut grows mold, and some molds produce aflatoxin, a dangerous poison. Buyers reject contaminated lots, and the toxin is harmful to people and animals.
After pulling the plants, let them dry in the field in neat stacks or windrows for a few days, with pods facing upward and off wet soil if you can. Then strip the pods and dry them further on tarpaulins, raised racks, or clean concrete, never directly on bare earth. Turn them regularly. You want the kernels dry enough to rattle in the shell and snap cleanly. Sort out damaged, moldy, or shriveled pods and keep them separate from the good ones.
Store only fully dry groundnut in clean, dry, ventilated bags, raised off the floor and kept away from damp walls. Check them from time to time for insects and moisture.
What I would do differently if I started again today
If I were starting from scratch on one acre, I would buy certified seed of a variety suited to my area and test germination before planting. I would plant early, once the rains are steady, at tight spacing with careful gap filling. I would apply phosphorus at planting and gypsum at flowering, and no nitrogen at all. I would weed carefully twice, then leave the soil alone. I would walk the field every few days and act at the first signs of leaf spot or rosette. I would harvest by checking pods, not the calendar, and dry on tarps.
Most of all, I would keep a notebook with dates, rates, costs, and yields, so each year I improve on the last. That notebook alone has taught me more than any training course. When you write it down, you stop guessing.
Frequently asked questions
How many bags of groundnut can I get from one acre?
It depends on bag size and variety, but a typical farmer gets around 400 to 500 kg of unshelled pods per acre. With good seed, proper spacing, gypsum, and timely weed and disease control, 800 to 1,200 kg is a realistic target on suitable soil.
Why do my groundnut plants flower well but produce empty pods?
The most common cause is calcium shortage in the pod zone. Dry spells during pod filling, poor soil, and late or damaged pegs also contribute. Apply gypsum at flowering and keep the topsoil moist and undisturbed.
What is the best spacing for groundnut?
For most varieties, about 50 cm between rows and 10 to 15 cm between plants in the row, with one or two seeds per hole. Check your variety’s recommendation, because spreading types may need slightly more room.
How long does groundnut take to mature?
Typically 90 to 120 days, depending on the variety and weather. Confirm maturity by checking the inside of the shells and the color of the kernels, not just by counting days.
Does groundnut need nitrogen fertilizer?
Generally no. Groundnut fixes its own nitrogen. Focus on phosphorus and calcium, and consider an inoculant if you are planting on new land that has never grown groundnut.
The one thing to remember
Groundnut is made underground, so feed the ground, not the leaves.