How to Fix Yellow Leaves on Tomato Plants
How to Fix Yellow Leaves on Tomato Plants
Years ago I walked into my best tomato block on a Monday morning and saw yellow leaves on almost every plant. My first thought was disease. I rushed to the store, bought an expensive fungicide, and sprayed the whole field. A week later the leaves were still yellow, and I had wasted money on the wrong problem. The real cause was a waterlogged corner and hungry soil. A spray was never going to fix that.
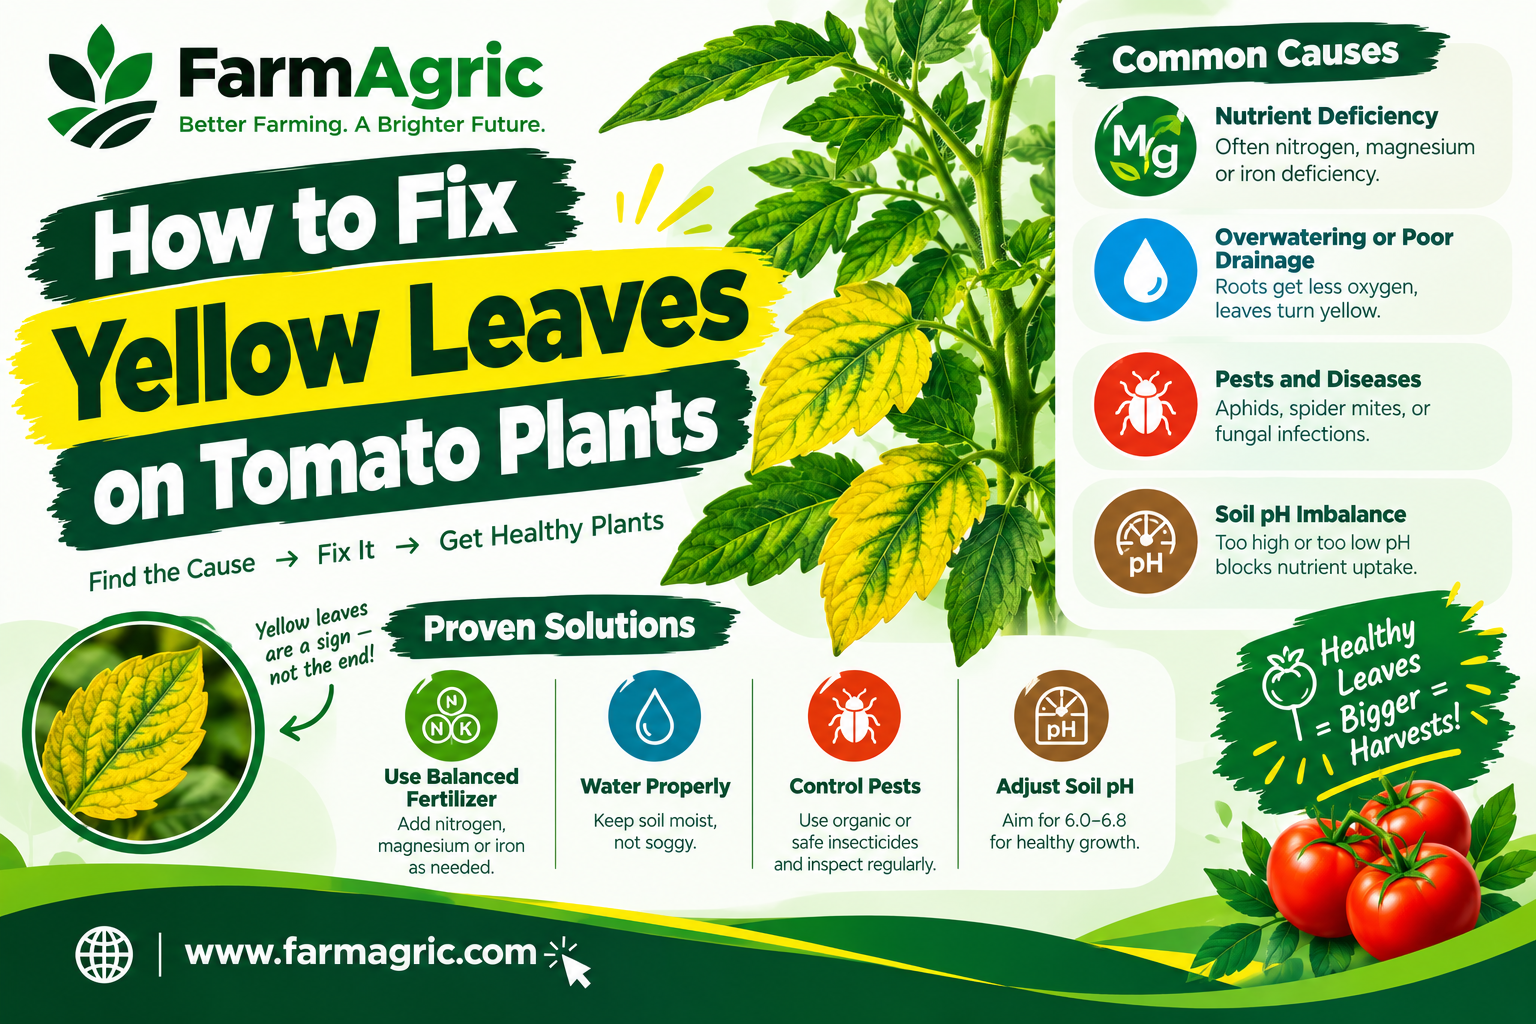
Here is the direct answer. Yellow leaves on tomato plants are most often caused by too much or too little water, a nitrogen shortage, or early fungal disease. To fix them, first check where the yellowing starts. Yellow lower leaves usually point to water stress, nitrogen shortage, or leaf spot disease. Yellow new leaves usually point to an iron or other micronutrient problem, or a virus. Correct the watering, feed the plant based on what the leaves show, remove the affected leaves, and treat disease only if you can see spots, rings, or wilting. One or two yellow leaves at the very bottom of a mature plant are normal and need no action at all.
The skill is in telling the causes apart, because each one needs a different fix. Let me walk you through how I do it.
What Most Farmers Get Wrong
The biggest mistake is treating yellow leaves as one problem. It is a symptom, and a symptom can have 8 or 9 different causes. Spraying fungicide on a nitrogen shortage does nothing. Pouring fertilizer on a waterlogged plant makes it worse.
The second mistake is overwatering out of love. I have seen farmers water every day because the sun is hot, while the roots sit in wet soil with no oxygen. Drowned roots cannot take up nutrients, so the plant shows hunger signs even though the soil is rich. The leaves turn yellow, and the farmer adds more fertilizer and more water. The cycle continues until the plant dies.
The third mistake is looking at only one leaf. Pull back and look at the whole plant, then the whole row. Is the problem on old leaves or new ones? On one plant or many? In one corner or everywhere? The pattern tells you the cause faster than any test.
The fourth mistake is ignoring the soil. Most yellowing I see traces back to soil that is too acidic, too compacted, or low in organic matter. A plant cannot be fixed from the top if the problem sits in the root zone.
Step 1: Read the Pattern
Before you buy anything, spend 10 minutes in the field and match what you see to this list.
Older, lower leaves turn pale green and then yellow evenly, and growth is slow. This is classic nitrogen shortage. The plant moves nitrogen from old leaves to new growth, so the bottom goes yellow first.
Older leaves turn yellow between the veins while the veins stay green. This points to magnesium shortage. It often shows up in sandy or very acidic soil and when fruit is heavy on the plant.
Newest, top leaves turn yellow while the veins stay green. This suggests iron shortage, usually caused by soil that is too alkaline or too wet, and not by a lack of iron itself.
Lower leaves have brown spots with rings, like a target, and a yellow halo. This is early blight, a fungal disease. It starts low and climbs.
Many small, round spots with dark edges and pale centers, and leaves yellow and drop. This is septoria leaf spot, another fungal disease that spreads in wet weather.
Yellowing on one side of the plant or one branch, with wilting in the heat. This points to fusarium wilt. Cut the stem near the base. If you see brown streaks inside, it is likely fusarium or verticillium.
New leaves small, curled upward, and yellow at the edges, with stunted plants and whiteflies around. This is tomato yellow leaf curl virus, spread by whiteflies. There is no cure.
Yellowing with swollen, knotty lumps on the roots. This is root knot nematode damage.
Whole plant yellow, stems soft near the soil, soil constantly wet. Overwatering and root rot.
Leaves yellow, dry, and crispy at the edges in hot weather. Underwatering, heat stress, or sunscald.
Fine webbing and tiny speckles on leaves. Spider mites feeding on the leaf.
Step 2: Fix the Water First
In my experience, water is behind more than half of the yellow leaf cases I am called to look at.
If the soil is too wet. Stop watering for a few days. Push your finger 5 cm into the soil. If it is wet and cool, wait. Improve drainage by opening furrows between rows, raising the beds, and clearing blocked channels. For pots and containers, make sure the drainage holes are open. Once the soil dries slightly, resume watering at a lower rate.
If the soil is too dry. Water deeply and slowly, so the water reaches the root zone, which is 20 to 30 cm down. Light daily sprinkling only wets the surface and encourages shallow roots. Then mulch with dry grass, straw, or crop residue to hold moisture and keep the soil cool.
The rule I follow. Water deep and less often, rather than shallow and every day. Aim for steady moisture, not wet, dry, wet, dry. Tomatoes hate that swing.
Step 3: Feed the Plant What It Needs
Do not guess. Feed according to the pattern you read in Step 1.
For nitrogen shortage. Apply a nitrogen source such as well-rotted manure, compost, urea, or a balanced NPK fertilizer. Place it in a small ring about 10 to 15 cm from the stem, not touching it, and water it in. I split my feeding into small applications every 2 to 3 weeks rather than one big dose. A big dose burns roots and washes away in rain.
For magnesium shortage. Apply Epsom salt (magnesium sulfate) dissolved in water. A common rate is about 1 tablespoon per liter of water as a foliar spray or soil drench every 2 weeks, until the new leaves recover. Also, check the soil pH, because acidic soil locks up magnesium. Liming with dolomitic lime corrects both acidity and magnesium shortage in one go.
For iron shortage. Check the soil pH first. Tomatoes grow best at a pH between 6.0 and 6.8. If it is too high, add organic matter and sulfur-based amendments over time. For a quick fix, apply chelated iron as a foliar spray according to the label.
For general hunger. Add compost to every planting hole. Compost feeds the plant slowly and improves water holding and drainage at the same time. It is the cheapest long-term fix I know.
Always be careful with too much fertilizer. Excess nitrogen gives you big leafy plants with few fruits, and it makes plants more attractive to pests.
Step 4: Deal with Disease Properly
If your leaves show spots, rings, or one-sided wilting, you are fighting disease. Here is how I handle it.
Early blight and septoria leaf spot. Remove the lowest leaves, the ones touching or close to the soil, and also all leaves showing spots. Burn them or bury them far from the field. Do not throw them in a pile near your plants. Water at the base of the plant in the morning and avoid wetting the leaves. Space plants wide enough for air to move through, and stake or trellis them so the foliage stays off the ground. If the disease keeps spreading, use a registered fungicide such as one containing copper or chlorothalonil, following the label for dose and spacing. Start at the first sign and not after half the field is yellow.
Fusarium and verticillium wilt. There is no cure once the plant is infected. Pull out the affected plants with the roots and remove them from the field. Do not plant tomatoes, peppers, eggplant, or potatoes in that spot for 3 to 4 years. Next season, choose resistant varieties, which are labeled with the letters V and F on the seed packet.
Tomato yellow leaf curl virus. Remove infected plants early so the virus does not spread. Control whiteflies with yellow sticky traps, reflective mulch, insect-proof netting in the nursery, and registered insecticides if the numbers are high. Plant resistant varieties where the virus is common. Keep weeds down, because many weeds carry the virus and whiteflies.
Root knot nematodes. Rotate with cereals such as maize or sorghum, and with marigold or other trap crops. Add plenty of organic matter. Use resistant varieties, labeled with the letter N, and solarize the soil by covering moist ground with clear plastic during the hot season.
Step 5: Prune and Clean Properly
Pruning helps, but only when done correctly. Remove the bottom leaves up to about 30 cm from the soil, once the plant is established and fruiting. This improves airflow and keeps soil-borne spores from splashing onto the leaves.
Always use clean tools. I dip my blade in a bleach solution or rub it with alcohol between plants when disease is around. Dirty knives carry disease from plant to plant faster than wind.
Do not strip too many leaves at once. The plant needs foliage to feed the fruit and shade it from the sun.
Warning Signs You Should Never Ignore
Some yellowing is a mild signal and some is an emergency. Act fast if you see:
Yellowing that spreads upward quickly over a few days. Something is attacking the plant and not just feeding it poorly.
Wilting even when the soil is moist. This suggests root damage, wilt disease, or nematodes.
Brown streaks inside the stem when you cut it. Vascular disease. The plant will not recover.
Leaves curling, shrinking, and yellowing at the top. Possible virus. Check for whiteflies.
Sticky leaves or sooty black coating. Whiteflies or aphids are feeding in large numbers.
Dropping flowers along with yellowing leaves. The plant is under heavy stress from heat, water, or disease.
When Yellow Leaves Are Normal
Not every yellow leaf is a problem. As a plant grows tall and heavy with fruit, the lowest leaves lose sunlight and turn yellow naturally. If it is only 1 or 2 leaves at the bottom, and the rest of the plant is green and growing well, simply pinch them off and carry on. A good plant sheds old leaves to keep going.
What I Would Do Differently If Starting Again Today
I would test my soil before planting anything. A soil test costs very little compared to a failed crop, and it tells you the pH and what nutrients are missing. Half the yellow leaf problems I have faced could have been avoided by this one step.
I would build raised beds or ridges on any field that holds water, because drainage has saved me more crops than any chemical.
I would add compost or well-rotted manure every season, and I would rotate tomatoes with cereals and legumes so that disease and nematodes do not build up in the soil.
I would buy disease-resistant seed from a trusted supplier, even when it costs a little more. The cheap seed is the expensive seed when the plants wilt.
I would keep a field notebook. Every time I see yellowing, I write down the date, weather, watering, and which plants. After a season, the pattern is obvious.
And I would walk my field every morning, because the best fix is the one you apply on the first day you notice a problem.
Frequently Asked Questions
Should I remove yellow leaves from tomato plants?
Yes, if they are badly yellow, spotted, or touching the soil. Cut them with a clean blade. Do not remove more than about a third of the foliage at one time.
Can yellow tomato leaves turn green again?
Usually not. Once a leaf has turned fully yellow, it will not regain its color. The goal is to stop new leaves from yellowing, so watch the new growth to see whether your fix is working.
Is Epsom salt good for yellow tomato leaves?
Only if the yellowing is caused by magnesium shortage, which shows as yellow between green veins on older leaves. It will not help with overwatering, disease, or nitrogen shortage, so do not use it blindly.
Why are my tomato leaves yellow after transplanting?
Transplant shock is common. Roots are damaged during moving and cannot take up water well for a few days. Water gently, give some shade for 2 to 3 days, and avoid heavy fertilizer right away. Most plants recover within a week.
What is the fastest way to tell the cause of yellow leaves?
Check where the yellowing starts, then check the soil moisture, then look closely for spots, rings, or pests. Those three checks answer most cases in 10 minutes.
The Advice Worth Bookmarking
A yellow leaf is the plant talking, not shouting. Listen to where it yellows, how it yellows, and when, and the plant will tell you the cure before you spend a single naira on a bottle.